Are you confused by the many types of machining processes and not sure which one to use? Are you unsure which ones matter most in real production? Do you know how they differ in precision, efficiency, or cost? Can you explain when to use one process over another? Are you missing the fundamentals?
There are 10 core types of machining processes in metalworking. Turning removes material from rotating parts. Milling cuts complex shapes with multi-axis rotary tools. Drilling forms clean cylindrical holes. Boring enlarges holes with tight precision. Grinding refines surfaces to micron-level finish. Tapping cuts internal threads. EDM erodes metal with controlled sparks. Broaching shapes profiles with multi-tooth tools. Sawing divides raw stock. Reaming improves hole roundness and surface quality. Each method targets specific tasks for accuracy, productivity, and geometric control.
Let’s explore these 10 essential machining processes—what they do, how they work, and why mastering them will give you a competitive edge in modern manufacturing.

What Are Machining Processes?
Machining processes are a group of manufacturing methods used to remove material from a workpiece to achieve a desired shape, size, or surface finish. These processes are subtractive, meaning they work by cutting, drilling, grinding, or otherwise removing unwanted material. They are fundamental to the production of precision parts in industries such as automotive, aerospace, electronics, and medical devices.
Unlike forming or casting, machining relies on controlled tool movements and mechanical forces to achieve accuracy. The material is typically removed using cutting tools or abrasive elements, guided by manual setups or computer-controlled systems like CNC machines. The goal is to produce functional surfaces with tight tolerances and repeatable quality.
There are many types of machining operations, each suited to specific geometries, materials, and production requirements. Understanding the different types of machining processes helps engineers select the best method for each task. Some processes focus on creating external shapes, while others are designed to generate precise holes, threads, or internal cavities. Knowing the boundaries of each technique—what it can and cannot do—is essential for efficient process planning and part design.
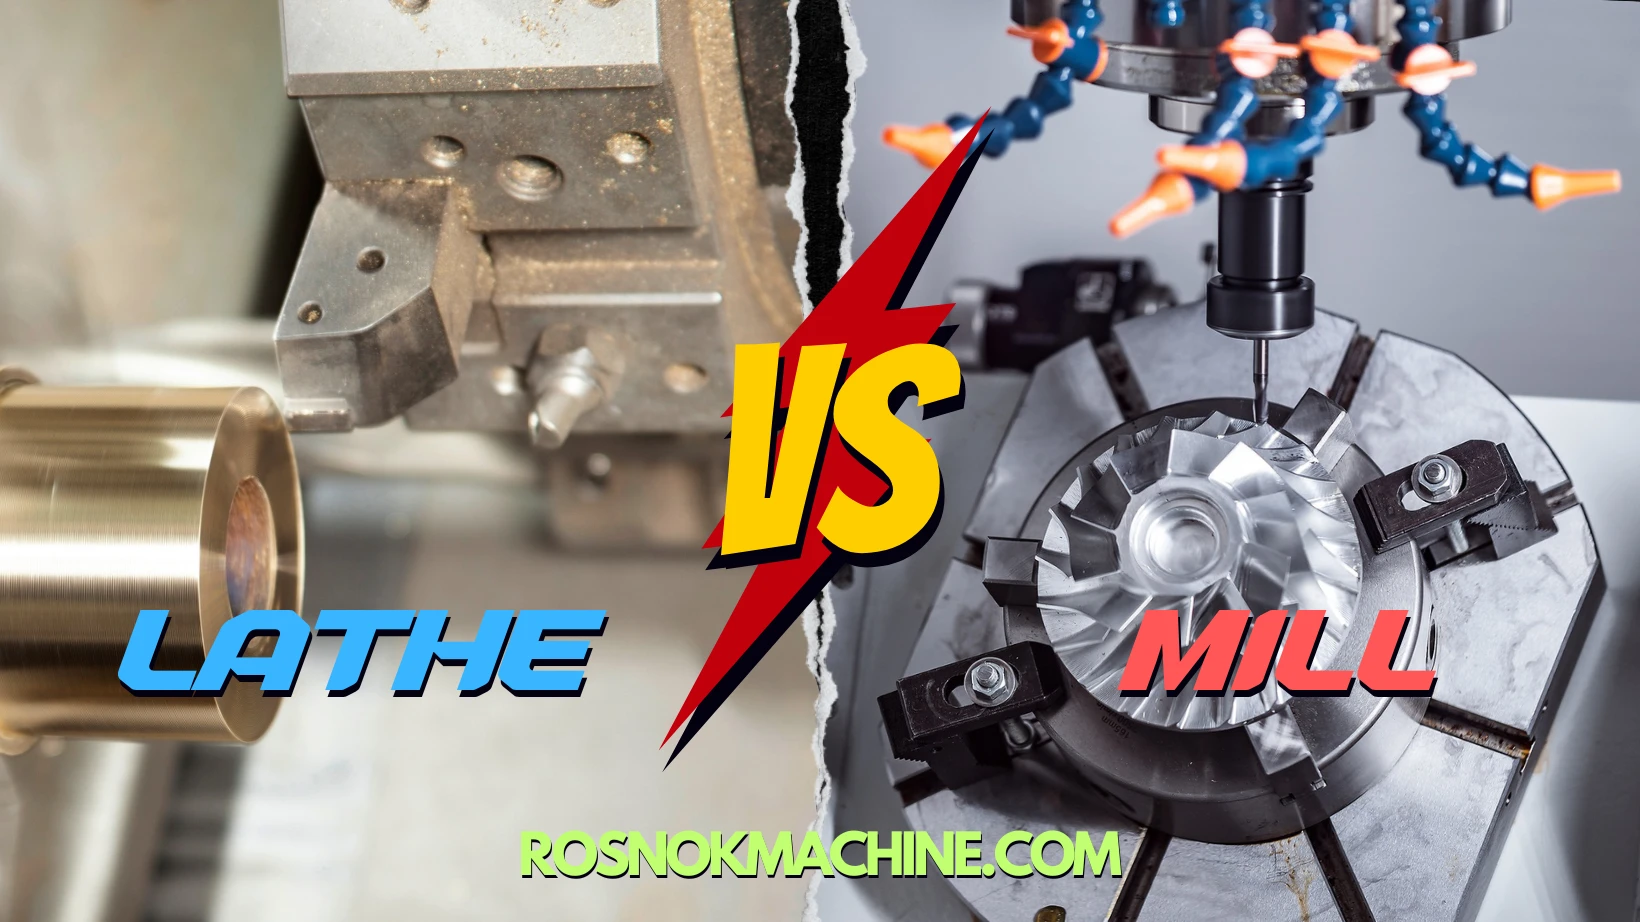
Turning
Turning is one of the most essential and frequently used machining processes in metalworking. It involves rotating the workpiece while a cutting tool moves linearly to remove material and shape the surface. This subtractive process is especially effective for producing cylindrical parts with high dimensional accuracy. Turning can be performed manually or with CNC lathes, which allow for automation, tight tolerances, and consistent quality. It forms the foundation of many different types of machining operations and is often the first step in transforming raw material into precise components.

Why Turning Is the Starting Point of Machining
Turning is one of the most widely used types of machining operations because it’s often the first step in shaping raw metal stock into workable parts. Using a lathe, the workpiece rotates while a stationary cutting tool removes material to create cylinders, tapers, or flat surfaces. It’s ideal for producing rotationally symmetrical parts like shafts, bushings, and pulleys. This process offers excellent dimensional control and is essential for establishing reference surfaces before other machining steps begin.
In high-volume manufacturing, turning is valued for its speed, repeatability, and versatility. Whether roughing a part from solid bar or refining features near the end of production, turning provides a balance of productivity and accuracy. That’s why understanding turning is foundational when exploring different types of machining processes in metalworking.
Common Turning Mistakes Beginners Often Make
Beginners frequently struggle with incorrect speed and feed settings. Running the spindle too fast can burn tools or produce rough finishes, while going too slow leads to chatter and inefficient cutting. Tool overhang is another common issue—it reduces stiffness and increases vibration, making it harder to hold tolerances.
Improper clamping and unsupported long workpieces often lead to deflection or bending during cutting, especially in deep or slender geometries. Additionally, new operators may choose inappropriate insert geometry or fail to align the tool properly with the workpiece axis. These mistakes can cause poor surface quality, increased tool wear, or even dangerous tool breakage. Knowing how to control these variables is essential when learning different types of machining operations.
How to Improve Surface Finish in Turning
To enhance surface finish in turning, several factors must be optimized together. Using the correct insert nose radius helps smooth out tool marks, while choosing the right feed rate prevents excessive scalloping. Adjusting the spindle speed to match material properties can also reduce built-up edge and improve consistency.
Coolant selection and delivery matter, too. A well-applied cutting fluid minimizes heat, flushes chips, and prevents surface discoloration. Ensuring tool sharpness and minimizing vibration through rigid setups are equally important. Together, these strategies significantly improve the surface quality of turned parts, especially in applications that require tight tolerances or cosmetic finishes. Mastering these techniques is key when comparing the performance of different types of machining processes.
Milling
Milling is one of the most adaptable and widely used machining processes in manufacturing. It involves rotating a cutting tool that moves across the workpiece to remove material in precise paths. This method supports both simple and complex part geometries. It’s often the go-to choice when working with flat surfaces, slots, contours, or multi-angled features. Milling is a core component of many different types of machining operations and is vital for modern CNC-based workflows.

Why Milling Is Ideal for Complex Geometries
Milling offers exceptional flexibility when it comes to shaping irregular or multi-dimensional surfaces. With multi-axis capabilities, CNC milling machines can move the tool along X, Y, and Z directions, and in some cases, rotate the tool or workpiece. This makes milling particularly effective for machining structural components, 3D contours, cavities, and intricate pockets.
Applications like aerospace brackets, mold cavities, and custom fixtures benefit greatly from milling’s precision and adaptability. Unlike turning, which is limited to rotational shapes, milling handles asymmetrical and angular geometries with ease. For manufacturers seeking control over surface detail, toolpath complexity, and dimensional tolerance, milling is often the best solution among all types of machining processes.
Milling Defects and How to Prevent Them
Common issues in milling include burr formation, edge chipping, and tool chatter. Burrs often result from improper feed or worn cutters, while vibration (chatter) arises from incorrect spindle speed or feed rates. To prevent these defects, ensure proper tool selection, maintain sharpness, and balance spindle speed with feed per tooth. Using rigid fixturing and applying climb milling are effective strategies for clean cuts and smooth surfaces.
When Not to Use Milling: Its Limitations
Milling can struggle with very deep cavities or tiny details where access is limited. It’s also less efficient for producing simple rotational parts, which are better suited to turning. Hard or abrasive materials can wear down cutters quickly during heavy milling, making grinding or EDM a better choice. Recognizing the boundaries of milling saves time, tooling costs, and prevents poor surface quality or premature cutter failure.
Drilling
Drilling is one of the most common machining operations used to create circular holes in metal, plastic, and other materials. It is typically performed with a rotating tool—called a drill bit—that advances along the axis of the hole. Drilling is essential in almost every industry, from aerospace to automotive. It’s fast and effective, but also surprisingly prone to errors if not executed with precision. As a core category in the types of machining processes, mastering drilling techniques is crucial for ensuring hole accuracy, alignment, and repeatability.

Hole Location and Size: Why Drilling Often Goes Wrong
Despite its apparent simplicity, drilling often introduces alignment and size errors. One common cause is drill bit walking, where the bit deviates from the intended center due to uneven surface contact or insufficient spot drilling. Tool deflection, especially in long or slender drills, causes the hole to bend or become tapered.
Another factor is machine instability. Vibration or backlash in the spindle or feed mechanism can skew the hole path. Moreover, incorrect feed rate and cutting speed can lead to overheating or chatter, both of which compromise hole diameter and surface finish. Accurate drilling demands rigid setups, short overhangs, and proper centering to avoid costly dimensional errors—especially critical when comparing different types of machining operations.
Types of Drill Bits and How to Choose the Right One
The choice of drill bit greatly impacts hole quality and efficiency. The most common is the twist drill, ideal for general-purpose use in steel and aluminum. Gun drills are better for deep, straight holes due to their high coolant delivery and self-centering tips. For composite materials or multi-layered stacks, step drills and split-point drills offer better control and reduced delamination.
Specialty bits like carbide drills are suited for hard materials, while coated drills (e.g., TiN or TiAlN) enhance tool life and reduce friction. Choosing the correct bit depends on material type, hole depth, surface finish requirements, and whether the operation is manual or CNC-controlled. Understanding drill geometry and coating technology helps optimize performance across different types of machining processes.
How to Manage Chip Evacuation in Deep Hole Drilling
Chip evacuation becomes a serious challenge in deep hole drilling, where swarf can clog flutes, increase friction, and damage the hole wall. This is especially true in blind holes or small-diameter bores, where space is limited. Poor chip control also raises the risk of drill breakage or built-up heat.
To manage this, use peck drilling cycles—repeatedly retracting the drill to clear chips—and select drills with deep helical flutes. High-pressure coolant delivery is critical for flushing chips from the cutting zone, cooling the tool, and reducing thermal distortion. In CNC setups, custom cycles and through-tool coolant systems dramatically improve safety and accuracy. Efficient chip management not only ensures cleaner holes but also extends tool life and overall productivity.
Grinding
Grinding is a finishing process that uses abrasive wheels to remove very small amounts of material for ultra-precise surface refinement. It is often used after machining operations like milling or turning to meet tight tolerance and surface roughness requirements. Among the different types of machining processes, grinding offers unmatched accuracy and smoothness, especially for hardened materials and critical geometries. Understanding when and how to use grinding is key to producing high-quality components with consistent flatness, shape, and dimensional control.

Grinding vs. Milling: Which Method Improves Surface Finish?
Milling and grinding both shape surfaces, but they differ significantly in application and output quality. Milling removes more material per pass, making it ideal for roughing or shaping parts quickly. However, its surface finish is typically in the range of Ra 1.6–3.2 µm. In contrast, grinding delivers superior finishes—often below Ra 0.4 µm—and holds tighter tolerances.
While milling is cost-effective and fast, grinding is essential when smooth surfaces or micro-level precision are needed. For hardened steels, grinding is also the only option that maintains geometry without excessive tool wear. Use milling for volume removal, and grinding for final surface perfection.
Burn Marks and Heat Damage: How to Prevent Them
Grinding generates significant heat, especially at high speeds or under aggressive depth of cut. This thermal buildup can cause discoloration, burn marks, and even microcracks in the material. These defects not only reduce part quality but also compromise mechanical integrity.
To prevent heat damage, it’s critical to maintain proper coolant flow directly to the grinding zone. Adjusting feed rate, wheel speed, and depth of cut also helps reduce friction and minimize heat. Dressing the wheel regularly restores sharpness and improves coolant penetration. For temperature-sensitive materials like titanium or tool steels, these practices are essential for safe and efficient operation.
How to Maintain Flatness in Surface Grinding
Surface grinding thin or wide workpieces poses challenges in maintaining flatness. Parts can warp due to clamping stress, heat buildup, or uneven material removal. This becomes more noticeable in aluminum and stainless steel, which are sensitive to thermal expansion.
To manage flatness, use magnetic or vacuum chucks to ensure even workholding. Apply light, consistent passes with gradual material removal, avoiding deep cuts. Dressing the wheel frequently keeps contact uniform and minimizes deflection. In critical parts like gauge blocks or die surfaces, controlled grinding environments and fine-tuned parameters are essential for achieving sub-micron flatness across the full work area.
Boring
Boring is a precision machining process used to enlarge and refine existing holes, particularly when exact diameter, alignment, or surface finish is critical. Unlike drilling, which removes material to create a new hole, boring works on pre-drilled or cast holes to bring them within tight dimensional tolerances. It’s especially valuable when a hole must align perfectly with other features or when achieving high roundness and concentricity is essential. Among all types of machining processes, boring plays a unique role in correcting internal geometry errors.

What Drills Can’t Do: Why Boring Is Essential
Drilling is fast but often leaves slight misalignments, tapering, or rough surfaces. That’s where boring steps in—not as a replacement, but as a complement. Boring is the only reliable method for correcting the axis of a hole to ensure it runs true, especially in engine blocks, hydraulic bodies, or precision housings.
It allows for fine control over final dimensions, down to microns. This makes boring essential for tolerance-critical components. In short, while drilling gets the hole started, boring makes it accurate, aligned, and functional. It’s this corrective ability that sets boring apart from other types of machining operations.
Setting Depth, Speed, and Tooling for Deep Boring
Deep-hole boring presents serious challenges, especially around tool deflection and vibration. The longer the tool overhang, the more prone it is to bending, which causes the hole to deviate from its intended path. This is particularly true when boring small-diameter, deep cavities.
To counteract this, minimize tool stick-out whenever possible. Use boring bars with high stiffness—often carbide or dampened steel. Reduce spindle speed and feed rate slightly to maintain stability, especially when using long tools. For deep holes, support tools with sleeves or steady rests to limit deflection.
Coolant delivery is also key. Through-tool coolant ensures proper chip evacuation and prevents thermal expansion that might distort measurements. Accurate boring in deep cavities depends on managing all these variables as a system—not just cutting deeper, but cutting smarter.
Tapping
Tapping creates internal threads in pre-drilled holes, offering a fast and reliable way to prepare parts for bolts or screws. This process is essential in assemblies across industries like automotive, electronics, and machinery. While straightforward in concept, tapping demands attention to detail—incorrect feed or preparation can easily damage threads or break taps. As a key method in the range of types of machining operations, precision here prevents costly scrap and rework.

Why Taps Break and How to Prevent It
A frequent problem in tapping is tap breakage, often caused by excessive feed or lack of lubrication. Feeding too fast can overload the small cutting edges, while too slow may cause chips to form inside the tool flutes. This buildup increases torque and risk of sudden tap failure. Prevent breakage by matching feed rate to thread pitch and applying proper cutting fluid. Also, ensure hole size matches recommended pre-drilled diameter for the chosen tap.
Thread Standards You Must Know
Internal threads follow sets of standards like M (metric), UNC/UNF (Unified), G (British), and NPT (American pipe threads). Each standard has specific thread forms and dimensional requirements. Choosing the right tap involves understanding these standards and selecting tools like bottoming, through, or spiral flute taps accordingly. Using the correct tap type saves time, ensures compatibility, and reduces the risk of stripping or cross-threading.
Tips for Tapping Hard Materials
Materials like stainless steel and titanium are tough on taps due to their strength and heat resistance. To tap such materials, reduce cutting speed, use blunt chamfer taps that handle long chips better, and apply high-pressure coolant directly to the threads. Back-off tapping (periodically reversing the tap) helps clear chips and reduce torque. These steps help preserve tool life and maintain thread integrity in high-performance applications.
EDM (Electrical Discharge Machining)
Electrical Discharge Machining (EDM) is a non-contact cutting method that uses electrical sparks to erode material. It excels where traditional cutting tools fail—especially on hard metals or delicate features. Unlike conventional machining processes that apply force, EDM removes material thermally, making it ideal for precise internal geometries, sharp corners, and hardened tool steels. EDM is a vital part of modern types of machining, offering capabilities unmatched by conventional methods.

When to Choose EDM Instead of Cutting
EDM is not a universal replacement for cutting, but it dominates in specific cases. Choose EDM when working with extremely hard materials like carbide, tool steel, or titanium. It’s also ideal for intricate internal cavities that are impossible to reach with rotary tools. Another benefit: since it’s a non-contact process, there’s zero mechanical stress on the part—making EDM perfect for fragile or thin-walled components. If accuracy and shape complexity are more important than speed, EDM is the clear choice.
EDM Settings and Parameter Selection
Success with EDM depends on careful tuning of electrical parameters. Discharge current controls the spark intensity, voltage affects gap stability, and pulse duration influences surface finish. Higher currents remove material faster but create rougher surfaces. For tight tolerances and fine finishes, lower settings with short pulse durations are preferable. Also, flushing conditions must be optimized to clear debris from the cutting zone. Mastering these variables ensures EDM produces clean, accurate results without damaging the part.
Electrode Wear Compensation and Cost Control
Electrode wear is a major cost in EDM. As the electrode erodes during cutting, it can change shape—affecting accuracy and requiring frequent replacements. To manage this, high-wear-resistant electrode materials like graphite or copper tungsten are used. Also, compensation systems in CNC-EDM machines can auto-adjust the toolpath based on expected wear. In mold making and mass production, planning for electrode consumption is critical for keeping per-part costs predictable and quality consistent.
Broaching
Broaching is a high-precision machining method that removes material with a multi-tooth tool in a single pass. It’s one of the most efficient types of machining operations when dimensional consistency and speed are required. The cutting action is linear, and each successive tooth removes a small amount of material. Though not as flexible as turning or milling, broaching excels in repeatability—making it ideal for mass production.

Ideal Parts for Broaching: What Makes a Good Candidate
Not every part is a good fit for broaching. Ideal candidates are components with internal or external profiles like keyways, splines, hexes, or specialized slots that demand exact repeatability. The material must be rigid but not too hard—typically medium-carbon steels or aluminum alloys. A key advantage: broaching can complete an entire shape in a single stroke. However, this requires that the shape’s depth, length, and geometry match the capabilities of the broach tool and machine stroke length.
Tool and Machine Requirements in Broaching
Broaching tools are highly specialized. Each one is designed for a specific profile and includes a series of progressively deeper cutting teeth. The tool must have adequate chip clearance to prevent jamming during the cut. Machines must also match the tool’s length and feed direction—typically vertical or horizontal broaching presses. Workholding is another crucial factor: rigid clamping ensures accuracy and prevents tool deflection. These technical requirements make broaching less versatile but extremely reliable when the setup is correct.
Production Planning for High-Volume Broaching
In mass production, broaching stands out for speed and consistency—but only if properly managed. Tool life is limited, so it’s critical to monitor edge wear and schedule tool replacements proactively. Coolant flow and chip evacuation must be optimized to avoid overheating or tool damage. For long runs, having multiple broaches and automated handling systems can dramatically improve throughput. Planning tool maintenance and swap intervals reduces downtime and ensures stable quality over thousands of cycles.
Sawing
Sawing is often the very first step in machining workflows. It’s a fast and cost-effective way to divide raw materials into manageable sizes. This process doesn’t aim for high precision but plays a critical role in material preparation. From bar stock to structural beams, sawing helps optimize layout and throughput before finer machining begins.

Saw Types and Their Use Cases
The most common types of sawing machines include circular saws, band saws, and abrasive cutoff machines. Circular saws are excellent for straight, fast cuts on thin materials. Band saws are more versatile, offering better performance on irregular shapes and thicker metals. Abrasive saws use friction instead of teeth and are preferred for hard alloys or when fine-tooth saws wear too quickly. Choosing the right sawing method affects cut quality, feed speed, and downstream processing effort.
How to Reduce Waste and Maximize Material Yield
Sawing may seem simple, but small details can lead to significant material loss. Kerf width—the amount of material removed during cutting—should be minimized to increase yield. Precision in material positioning also matters: inaccurate clamping or feeding can cause off-cuts or require rework. In batch production, optimizing cut length, reducing part spacing, and nesting can dramatically improve overall efficiency. Monitoring blade wear and maintaining alignment helps keep results consistent while minimizing scrap.
Reaming
Reaming is the final step in many hole-finishing operations. While drilling and boring remove most of the material, reaming provides the dimensional accuracy and surface finish required in precision assemblies. It is often used in aerospace, automotive, and tooling applications where a loose fit is not acceptable.

Why Reaming Is Key to Final Hole Accuracy
Unlike drilling or boring, reaming is not intended to significantly enlarge a hole but to bring it to its final, exact size. A reamer follows the existing hole axis, refining both geometry and surface integrity. It ensures consistency across parts and eliminates tool marks or irregularities left by rough machining. For any assembly requiring close-tolerance fits, especially with dowel pins or press-fit components, reaming becomes indispensable.
Setting Speed and Feed for Reaming
Cutting speed and feed rate directly impact the reamed hole’s roundness, straightness, and surface finish. Slower speeds and moderate feed usually work best. Too fast, and the reamer might vibrate or glaze; too slow, and it may rub instead of cut, causing poor finish. Material type and reamer geometry also matter. Carbide reamers, for example, tolerate higher speeds than HSS. Always use cutting fluid to reduce friction and clear chips effectively.
What Tolerances Can Reaming Actually Achieve?
With the right setup, reaming can routinely achieve tolerances of ±0.005 mm (±0.0002 in) and surface finishes down to Ra 0.4–1.6 μm. That’s significantly tighter than most drilled or bored holes. However, this depends on machine rigidity, reamer condition, and workpiece stability. In mass production, consistent tool wear monitoring is key to maintaining these tolerances over time.
How to Choose the Right Machining Process
Selecting the appropriate machining process isn’t just about the tools—it’s about understanding the part’s needs from multiple dimensions. Material type, shape complexity, precision requirements, and production scale all influence the best approach. A poor choice can lead to increased costs, wasted time, or compromised quality. This section breaks down how to make smart, informed decisions based on the key factors that define modern machining.

Choose by Material Type
Material is often the first decision point when evaluating different types of machining processes. Softer metals like aluminum or brass allow for high-speed milling and drilling with standard tools. But harder materials such as titanium or hardened steel require slower feed rates and specialized tooling, often relying on grinding or EDM to avoid premature tool wear. Fragile or heat-sensitive materials may also limit conventional machining options, making non-contact processes more suitable. Always match the material’s machinability to the process for the best performance and tool life.
Evaluate by Part Geometry
The shape of the part heavily influences your process selection. Cylindrical parts are ideal for turning, while prismatic components with flat faces or complex contours favor milling. Long, deep holes may require drilling followed by boring or reaming. For features like blind cavities, narrow slots, or internal contours that conventional tools can’t reach, EDM or broaching might be the only viable option. Understanding the geometry allows you to select the process that ensures accuracy without overcomplicating the setup.
Match to Tolerance and Surface Requirements
If your part requires tight tolerances or smooth surface finishes, this will greatly narrow your machining options. Milling and turning can meet general tolerances, but for precision fits and fine finishes, reaming, grinding, or honing are often necessary. Grinding, for instance, delivers micro-level flatness and smoothness. For threaded holes, tapping ensures precision over drilling. Each machining process has a defined capability range; choose accordingly to avoid secondary operations or poor quality.
Consider Volume and Production Flexibility
Are you making one part or ten thousand? Different types of machining operations scale differently. For high-volume runs, broaching and sawing offer speed and consistency with minimal setup time. CNC milling or turning is ideal for low- to medium-batch production, especially when flexibility and reprogramming are needed. For prototyping or custom parts, processes with faster changeovers—like CNC machining—will reduce downtime and increase agility.
Think in Terms of Total Cost
Cost isn’t just the price of the machine—it’s the sum of cycle time, tool wear, energy usage, setup time, and scrap rate. A slower method might be cheaper in the long run if it reduces defects or improves part longevity. Conversely, a faster process could become more expensive if it causes excessive tool wear or rework. Evaluate the full lifecycle cost to find the most economical machining process, especially when scaling production.

Conclusion
Understanding the many types of machining processes is not just about learning definitions—it’s about mastering the logic behind each technique. From turning and milling to EDM and broaching, every method serves a unique purpose in manufacturing, shaped by precision needs, material properties, and cost considerations. This guide was built to help you see the full picture, empowering smarter choices and better production results.
For manufacturers seeking to apply these processes effectively, the choice of machinery is just as critical as the process itself. That’s where partnering with a trusted CNC equipment provider becomes invaluable. With extensive experience in metal machining solutions, Rosnok offers a complete range of high-performance CNC machine tools, tailored to support diverse machining operations—from entry-level applications to advanced industrial production. Whether you’re aiming to boost productivity or improve accuracy, the right equipment makes all the difference.