Field data collected from various production facilities over the past decade indicates that machining accuracy often declines within the first few years of machine operation. This decline is rarely caused by a single issue; rather, it results from the gradual accumulation of mechanical wear, thermal effects, control system drift, and process variability.
To provide a clearer understanding of this complex phenomenon, this article outlines ten of the most common causes behind CNC machining accuracy degradation over time. Each point is presented with a technical explanation and practical considerations for identifying, mitigating, or preventing the issue.
The information is based on engineering field studies, machine diagnostics, and real-world operational data from a wide range of manufacturing environments. This structured overview serves as a reference for production engineers, maintenance professionals, and technical decision-makers seeking to optimize machining stability and precision over the long term.
1. Thermal Expansion in Machine Components
What Causes Thermal Expansion in CNC Machines?
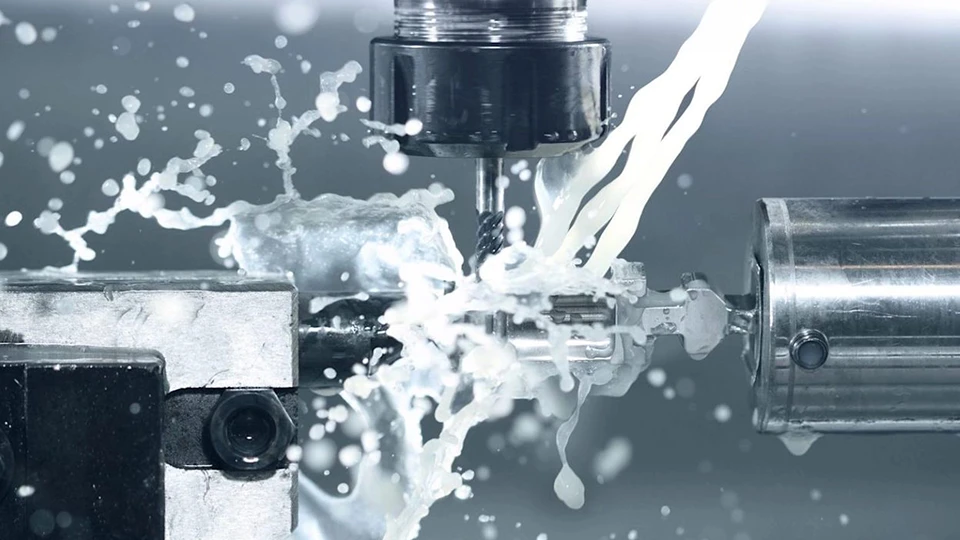
Thermal expansion is a common yet often underestimated factor in CNC operations. Heat is generated from multiple sources, including spindle rotation, servo motor activity, and cutting friction. These heat sources cause internal components to expand. Critical structural elements such as the spindle, linear guides, and machine frame are especially vulnerable. When heat is not evenly distributed or effectively managed, these expansions lead to minor geometric distortions that gradually accumulate and impact machining precision.
How Thermal Expansion Affects Machining Accuracy
Thermal expansion affects machining accuracy in several practical and observable ways:
- Z-axis elongation, where thermal growth of the spindle or column causes gradual changes in cutting depth, often leading to tapered holes or uneven pocket bottoms
- Dimensional drift during long cycles, as the machine geometry changes while machining is in progress, resulting in parts that vary from the beginning to the end of a production run
- Cold-to-warm variation, where parts produced immediately after startup differ from those machined after the machine reaches thermal equilibrium
- Geometric distortion in large workpieces, especially on tall or wide parts where small angular deviations translate into significant dimensional errors
- Reduced repeatability, making it difficult to maintain consistent tolerances across batches even when programs and tooling remain unchanged
These issues often go unnoticed during short production runs but become critical in high-precision or continuous operations. Understanding and controlling thermal behavior is essential for maintaining dimensional stability across varying workloads.
Practical Strategies to Reduce Thermal Impact
To limit the influence of thermal expansion, manufacturers commonly apply the following measures:
- Spindle warm-up routines that allow internal components to reach a stable operating temperature before precision machining begins
- Controlled ambient temperature to minimize external thermal fluctuations that can introduce additional machine distortion
- Thermally symmetric machine structures that help ensure expansion occurs uniformly rather than unevenly across the machine frame
- Thermal compensation functions that use temperature sensors and control algorithms to correct positional errors in real time
- Periodic calibration and verification, such as ballbar testing or laser measurement, to identify thermal drift trends and apply corrective offsets
While thermal effects cannot be completely eliminated, systematic thermal management significantly reduces their impact on both part quality and long-term process reliability.
2. Mechanical Wear in Screw Drives and Guideways
What Causes Mechanical Wear in CNC Motion Components?
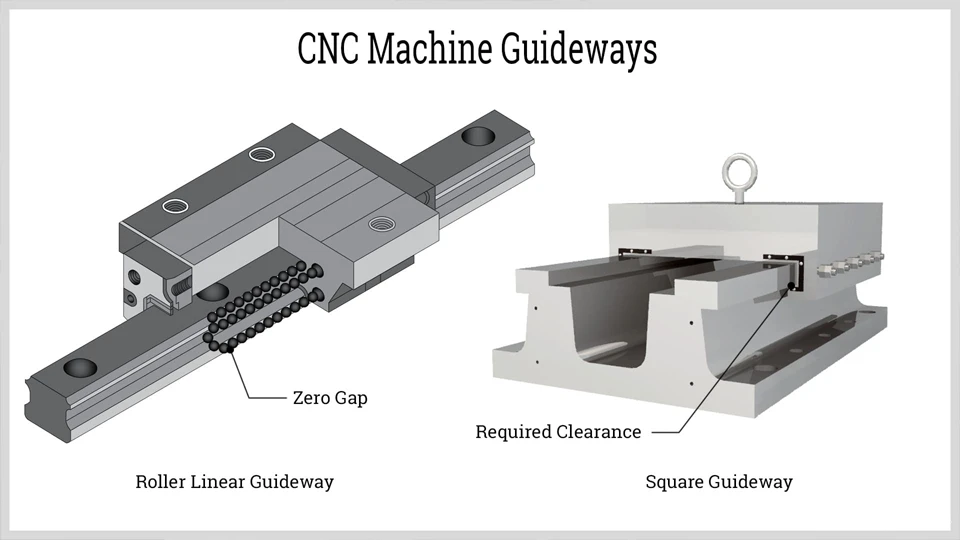
Screw drives and guideways form the core of axis movement in most CNC machines. These motion systems convert rotary input into precise linear travel and are critical for ensuring smooth, repeatable positioning. Over time, continuous load cycles, vibration, suboptimal lubrication, and environmental contaminants can cause gradual mechanical wear.
This wear often leads to increased internal clearance, loss of preload, or localized surface damage. As a result, axis rigidity and positioning stability begin to deteriorate. Improper maintenance, high-duty cycles, or exceeding load capacities can further accelerate the degradation of motion accuracy.
How Mechanical Wear Affects Machining Accuracy
Wear in motion components typically results in:
- Backlash during axis reversals, where lost motion leads to lag between commanded and actual tool position
- Fluctuations in toolpath execution during rapid feed changes or deceleration
- Surface chatter or waviness caused by reduced mechanical damping or rigidity
- Variations in repeatability across multiple passes or sequential parts
- Progressive geometric inaccuracies in long, multi-step operations
These symptoms tend to develop gradually, often escaping notice in low-precision jobs. However, in high-accuracy environments, even small amounts of mechanical play can compromise part tolerances and consistency.
Practical Strategies to Minimize Mechanical Wear
To reduce wear and maintain long-term positioning accuracy, consider the following practices:
- Apply correct lubrication intervals using manufacturer-specified grease or oil
- Periodically check for axial play and adjust or re-preload motion assemblies as needed
- Keep motion tracks and protective covers clean to prevent abrasive particle ingress
- Avoid overloading the machine with excessive speeds or forces beyond rated specs
- Use test cuts or calibration tools to regularly monitor backlash and compensate accordingly
Proactive maintenance of motion components ensures smoother machine operation, reduces scrap rates, and extends the usable service life of key mechanical systems.
3. Spindle Runout and Bearing Degradation
What Causes Spindle Runout and Bearing Wear?
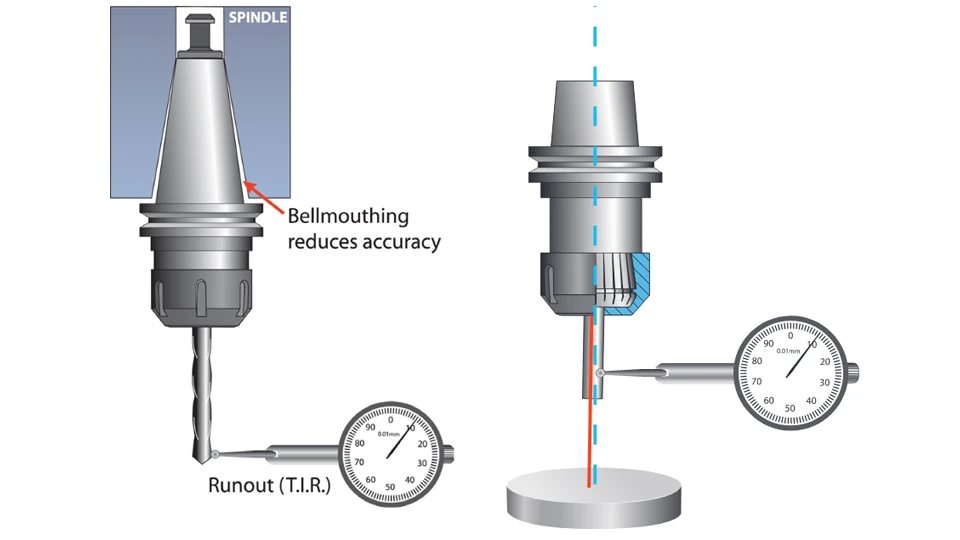
Spindle runout refers to the deviation of the spindle or tool tip from its ideal rotational axis. This can be caused by several factors, including taper contamination, toolholder imbalance, thermal distortion, or wear in the spindle interface. Even minor misalignment can result in lateral tool movement during cutting, especially at high spindle speeds.
Closely related to runout is bearing degradation within the spindle assembly. Bearings support the spindle during rotation and absorb both radial and axial loads. Over time, inadequate lubrication, excessive loading, thermal cycling, and mechanical shock can lead to surface wear, clearance loss, and a breakdown in preload. As bearing precision declines, the spindle becomes more prone to runout and vibration, creating a feedback loop that accelerates further wear.
How Spindle Issues Affect Machining Accuracy
Problems in the spindle assembly manifest in several critical ways:
- Lateral runout causes tool deflection, leading to oversized holes or inconsistent wall thickness
- Poor surface finish due to vibration, chatter, or tool oscillation at the cutting edge
- Axial instability during drilling, reaming, or boring operations, affecting depth precision
- Shortened tool life caused by uneven chip load and increased mechanical shock
- Reduced repeatability in high-speed or fine-finishing applications where micron-level control is required
These issues are especially problematic in high-RPM operations and when using long or slender tools. The effects of spindle imperfections tend to accumulate across multi-step processes, resulting in dimensional drift and quality loss over time.
Practical Strategies to Control Runout and Extend Spindle Life
To maintain spindle accuracy and reliability, the following actions are recommended:
- Keep tool taper and spindle interface clean and free of chips or oil residue
- Use high-precision toolholders and perform regular dynamic balancing for tools and assemblies
- Avoid aggressive feed rates or tool paths that introduce excessive lateral loads
- Follow a controlled spindle warm-up routine before operating at full RPM
- Conduct periodic runout and vibration checks using dial indicators or non-contact probes
- Schedule bearing inspection, lubrication checks, and spindle rebuilds based on runtime or vibration thresholds
Runout and bearing degradation often develop slowly but can have rapid consequences once tolerances are breached. Early detection and consistent maintenance are essential to ensure long-term spindle integrity and machining precision.
4. Looseness in Joints, Fixtures, and Mounting Surfaces
What Causes Looseness in CNC Assemblies and Workholding?
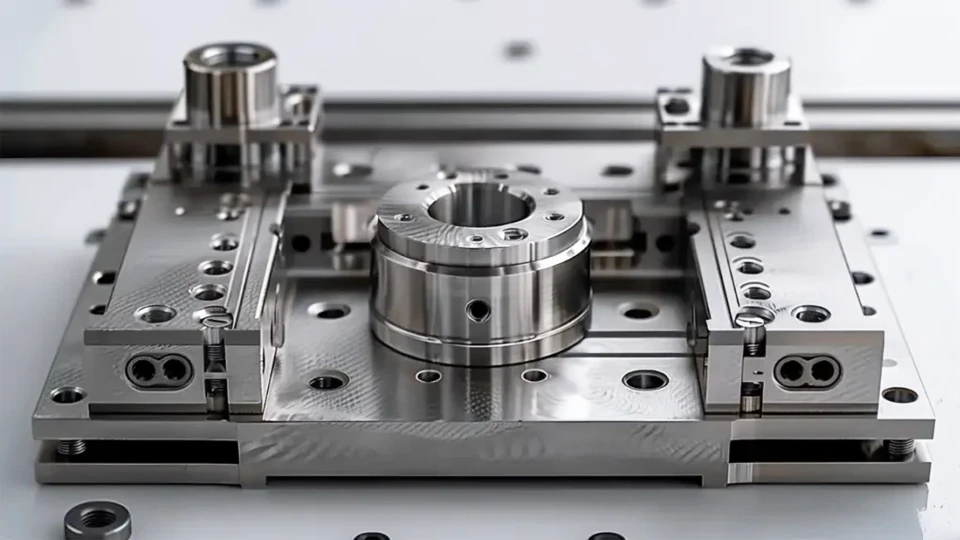
CNC machining depends heavily on mechanical rigidity at every level—from machine frame connections to workholding fixtures and tool mounting interfaces. Over time, repeated loading cycles, vibration, thermal expansion, and poor maintenance can introduce small clearances into mechanical joints. These may occur in structural fasteners, slideway bolts, fixture clamps, or toolholders.
Workholding systems, such as vises, chucks, or custom jigs, are particularly vulnerable if clamping forces are inconsistent or if surfaces wear unevenly. Additionally, subplates, rotary tables, and modular setups can develop flatness or contact issues over time, resulting in unstable foundations. These small deviations compound and manifest as loss of relative rigidity between tool and workpiece.
How Looseness Affects Machining Accuracy
Looseness and instability in mechanical interfaces can lead to several detrimental outcomes:
- Part shifting or vibration during cutting, especially under lateral tool forces
- Dimensional variation due to inconsistent clamping pressure or fixture deformation
- Angular misalignment, causing tapering or out-of-square features
- Poor surface finish caused by micro-movements at contact points
- Toolpath deviations, particularly during directional changes or rapid acceleration
These effects are most noticeable in heavy milling, interrupted cutting, or multi-axis positioning tasks. Even in light-duty operations, fixture instability can compromise repeatability and undermine process capability, especially when tight tolerances are involved.
Practical Strategies to Eliminate Looseness and Improve Rigidity
To maintain mechanical integrity and ensure stable cutting conditions, consider the following actions:
- Perform periodic torque checks on machine base bolts, column fasteners, and structural joints
- Inspect workholding fixtures for wear, surface flatness, and parallelism
- Use hardened location pins, dowels, and bushings to increase repeatable alignment
- Maintain clean, burr-free contact surfaces on tables, subplates, and fixture bases
- Standardize clamping procedures and validate clamping force for critical parts
- Apply vibration-damping materials or support structures where necessary
Consistent attention to mechanical tightness—both in the machine and in the fixturing system—prevents the gradual loss of accuracy caused by small shifts and misalignments. Precision relies not just on programming and tooling, but on the physical stability of the machining environment itself.
5. Tool Holder Inaccuracy and Poor Tool Clamping
What Causes Inaccuracy in Tool Holding Systems?
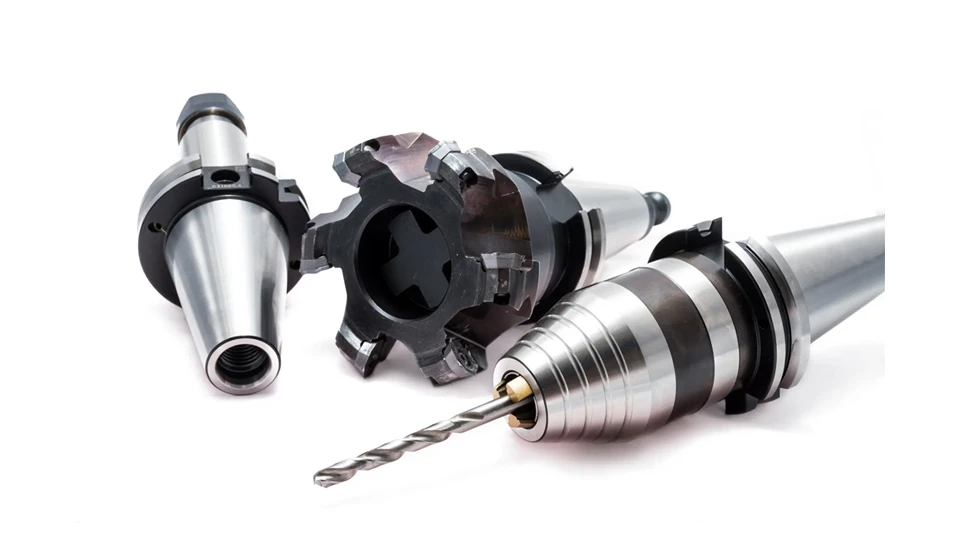
Tool holders serve as the critical link between the cutting tool and the machine spindle. Their role is to maintain precise alignment, concentricity, and clamping force during high-speed rotation. However, in practice, several factors can lead to tool holder inaccuracies.
Common issues include improper seating of the tool holder in the spindle taper, contamination on the mating surfaces, wear or deformation of collet systems, and unbalanced tool assemblies. Over time, repeated loading cycles and poor handling practices may also distort tool holder geometry or reduce the effectiveness of clamping mechanisms.
Additionally, the quality and type of tool holder—such as collet chucks, shrink-fit holders, hydraulic holders, or mechanical chucks—significantly influence tool runout and vibration behavior. Lower-grade or worn holders introduce unpredictable tool movement, even when cutting programs are correct.
How Tool Holding Errors Affect Machining Accuracy
Deficiencies in tool holding and clamping can result in a range of accuracy and quality problems:
- Radial runout at the cutting edge, leading to uneven material removal and inconsistent surface finish
- Tool deflection under cutting load, especially when clamping force is insufficient or off-center
- Premature tool wear caused by uneven chip load or vibration at the tool tip
- Axial shifting of the tool, affecting depth control in drilling, pocketing, or contouring
- Chatter and resonance during high-speed operations, reducing part quality and machine life
In multi-axis operations or fine finishing tasks, even slight deviations in tool positioning can propagate through complex toolpaths, resulting in accumulated error and reduced dimensional control.
Practical Strategies to Improve Tool Holding Accuracy
To ensure stable and precise tool clamping, the following practices are recommended:
- Clean spindle tapers and tool holder surfaces regularly to avoid contamination-induced misalignment
- Inspect and replace worn collets, nuts, and holders based on usage intervals or runout measurements
- Use balanced tool holder assemblies for high-RPM applications to reduce vibration
- Apply correct torque settings when securing tools, avoiding both under- and over-tightening
- Select tool holder types that match the machining requirements (e.g. shrink-fit for high-speed, hydraulic for vibration damping)
- Periodically measure tool runout at the tip using dial indicators or laser probes
Maintaining high-precision tool clamping is essential not just for cutting accuracy, but also for tool longevity, spindle health, and overall machining stability. A well-maintained tool holding system forms the final stage of the machine’s accuracy chain.
6. Inconsistent Tool Wear and Tool Life Management
What Causes Inconsistent Tool Wear in CNC Machining?
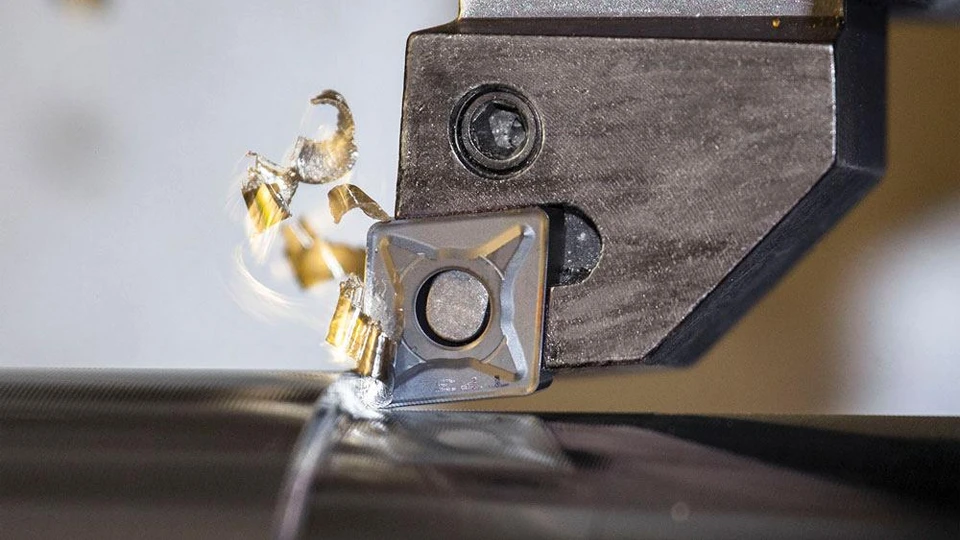
In CNC operations, cutting tools are subject to high levels of thermal, mechanical, and chemical stress. Over time, these stresses lead to wear on the tool’s cutting edge, coating, and substrate. While gradual wear is expected, inconsistency in wear rates across tools, batches, or operations introduces significant variability in machining performance.
Factors contributing to irregular tool wear include improper cutting parameters, unstable workholding, poor coolant delivery, substandard tool materials, or lack of consistent tool change intervals. In multi-tool or automated environments, unmonitored wear rates can result in some tools being overused while others are replaced prematurely—both scenarios reduce machining reliability.
More critically, without a proper tool life management strategy, it’s difficult to maintain dimensional consistency over extended production runs. This leads to unexpected quality drift, especially in finishing operations where sharp edges and minimal deflection are essential.
How Inconsistent Tool Wear Affects Machining Accuracy
Irregular tool wear and unmanaged tool life lead to a wide range of accuracy-related problems:
- Dimensional drift as worn tools remove less material or lose cutting geometry
- Surface roughness variation between parts or even within a single part
- Tool deflection increases, affecting contour accuracy and hole roundness
- Secondary burr formation and poor edge definition in fine-feature machining
- Increased risk of tool breakage mid-cut, potentially damaging parts or fixtures
In high-volume production, even slight variations in wear rates between identical tools can create significant inconsistencies across batches. This is especially critical in industries requiring tight tolerances and traceable process control.
Practical Strategies for Tool Life Monitoring and Control
To reduce accuracy loss from tool wear, manufacturers should implement structured tool life management practices such as:
- Establishing and enforcing consistent tool change intervals based on cutting data and tool type
- Using tool life monitoring software or sensor-based systems to track usage and wear trends
- Conducting regular visual inspections or in-process measurement of critical dimensions
- Optimizing cutting parameters—feeds, speeds, and coolant flow—to minimize thermal and mechanical stress on tools
- Grouping tool changes into predictable cycles to synchronize wear and simplify scheduling
- Maintaining a record of tool batch performance to identify underperforming tool lots or suppliers
Effective tool wear management stabilizes part quality, reduces scrap, and enables predictive scheduling. More importantly, it ensures that tool-related accuracy loss does not become a hidden variable in the machining process.
7. Control System Drift and Servo Motor Aging
What Causes Control Drift and Servo Degradation?
Over time, the electronic components that control CNC machine axes—such as encoders, servo drives, feedback loops, and power amplifiers—undergo gradual degradation. This often results from thermal stress, electrical noise, aging of capacitors, or mechanical wear in feedback devices. These shifts lead to what is commonly known as control drift: small, progressive inaccuracies in the way position commands are interpreted and executed.
In parallel, servo motors—especially those in continuous-duty applications—experience performance loss due to bearing wear, increased resistance in windings, magnet degradation, or mechanical backlash in the coupling systems. As response times slow down and following errors increase, the control system struggles to maintain accurate motion synchronization.
Crucially, these changes happen gradually and may not trigger system alarms. However, they create inconsistencies in axis positioning, feedrate stability, and contouring precision.
How Control Drift and Servo Aging Affect Machining Accuracy
Control system instability and servo degradation can cause multiple accuracy-related symptoms:
- Axis lag or overshoot, particularly in direction changes or high-acceleration toolpaths
- Inconsistent feedrate or hesitation during complex interpolated movements
- Positioning deviation during fine finishing passes or micro-adjustments
- Poor contour fidelity in 3D profiling or simultaneous multi-axis machining
- Increased cycle-to-cycle variation, especially in high-volume production environments
These effects are especially damaging in applications requiring continuous axis synchronization, such as circular interpolation or tight-tolerance hole patterns. What may appear as mechanical looseness or thermal distortion can often be traced back to minor electronic control shifts.
Practical Strategies to Stabilize Control and Servo Performance
To minimize control system drift and prolong servo accuracy, the following actions are recommended:
- Calibrate encoder feedback and verify zero-reference alignment on a scheduled basis
- Replace aging power supply units, capacitors, and signal cabling before voltage degradation sets in
- Monitor servo load, current draw, and following error logs to detect gradual performance loss
- Clean and reseat all electrical connectors to avoid signal loss or intermittent noise
- Execute dynamic tuning of PID parameters as wear accumulates or machine behavior changes
- Use diagnostic tools to analyze servo loop stability, backlash compensation, and interpolation integrity
By actively managing both the control logic and servo hardware condition, manufacturers can maintain tight motion control and prevent invisible drift from compromising production accuracy.
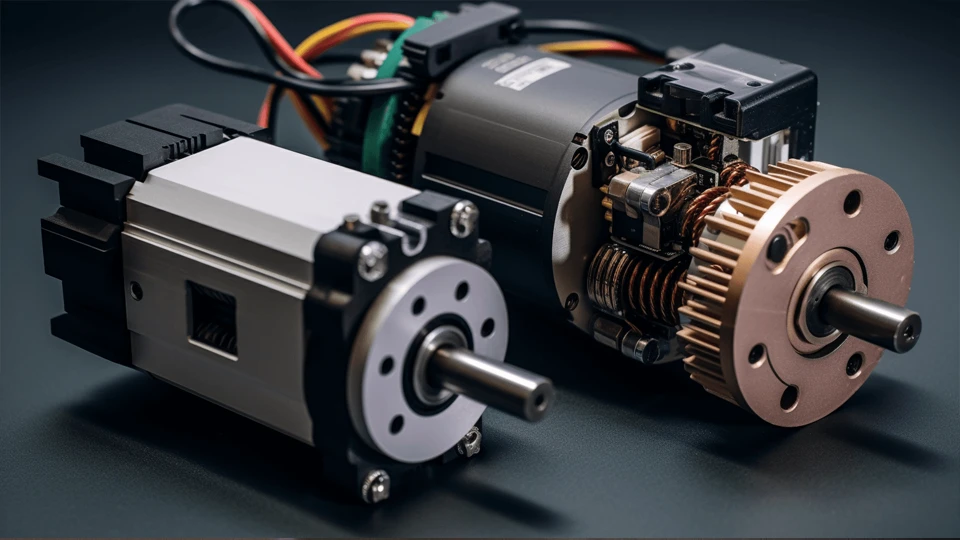
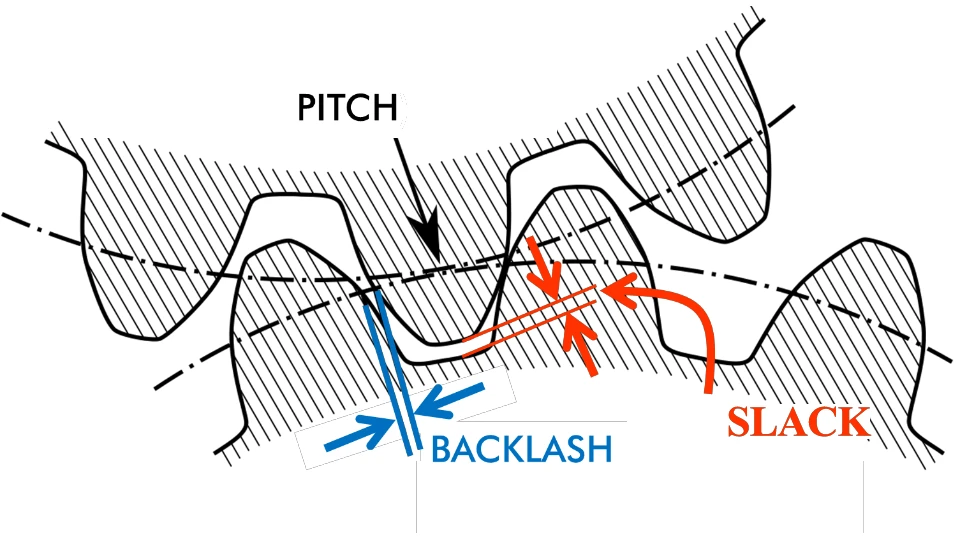
8. Backlash from Gear Trains or Poor Compensation Settings
What Causes Backlash in CNC Systems?
Backlash refers to the lost motion or clearance between two mating mechanical components when movement direction reverses. In CNC machines, this is most commonly observed in gear trains, older leadscrew systems, or any mechanical interface where clearance is required for rotation or lubrication.
Gear-driven axes—especially those using worm gears, planetary reducers, or belt-driven transmission—are particularly prone to backlash due to gear tooth spacing, wear, and mounting flexibility. Even with high-precision gearing, repeated acceleration, deceleration, and load variation can widen these mechanical gaps over time.
In modern CNC control systems, backlash compensation settings are used to digitally offset this clearance by adjusting axis position commands. However, if these parameters are incorrectly set, outdated, or ignored during maintenance, the compensation becomes ineffective—causing persistent positioning errors even on machines that are mechanically sound.
How Backlash Affects Machining Accuracy
Uncompensated or poorly controlled backlash can produce a wide range of machining defects:
- Dimensional inaccuracy when cutting parts that involve frequent direction changes (e.g., square pockets, bores)
- Step marks or inconsistent surface finish caused by hesitation or lag during axis reversal
- Out-of-round features in interpolated circular paths, especially small holes or internal contours
- Tapered cuts or edge mismatches in parts requiring tight parallelism
- Reduced repeatability in both roughing and finishing operations where precision starts and stops are required
The more complex the part geometry and the more frequent the axis reversal, the greater the negative impact of even small amounts of backlash.
Practical Strategies for Controlling Backlash
To minimize backlash-related errors and maintain machining precision, the following best practices are recommended:
- Inspect gearboxes and drive assemblies for wear, loose couplings, or misalignment
- Replace worn or aging reduction gears, belts, and pulleys at scheduled intervals
- Calibrate backlash compensation values using laser interferometers or precision gauges
- Update control system parameters whenever mechanical components are repaired or replaced
- Use mechanical preloading or dual-drive systems where applicable to eliminate backlash at the source
- For older machines, consider retrofitting with servo-direct drives to reduce mechanical transmission altogether
Backlash may not always be immediately visible, but its effects compound quickly in precision applications. A combination of mechanical inspection and software calibration is essential to keep positioning errors under control.
9. Lack of Preventive Maintenance and Alignment Checks
Why Preventive Maintenance Matters for CNC Accuracy
CNC machines are high-precision systems composed of mechanical, electrical, and thermal subsystems working in tight synchronization. While initial alignment and calibration ensure factory-level accuracy, precision inevitably drifts over time without structured preventive maintenance.
Lubrication systems degrade. Dust, chips, and coolant residue build up on motion components. Fasteners loosen due to vibration. Axis alignment shifts microscopically under thermal cycling or after long periods of use. If these changes go unmonitored, they slowly erode the machine’s ability to position, cut, and repeat within specified tolerances.
Routine maintenance—like lubrication checks, bolt torque validation, and rail cleaning—is often deprioritized under production pressure. Similarly, alignment inspections using dial indicators, test cuts, or laser tools are skipped unless a visible error occurs. But by the time problems appear on parts, the precision baseline is already compromised.
How Lack of Maintenance Affects CNC Machining Accuracy
Skipping preventive maintenance and geometric verification introduces:
- Gradual misalignment between machine axes, causing squareness or parallelism errors
- Loss of stiffness due to loosened bolts, gibs, or subplates
- Increased friction and servo load from contaminated guideways or dry linear components
- Backlash growth if preloads and drive settings are left unchecked
- Thermal distortion effects if coolant systems, fans, or heat sinks are degraded
The result is a steady degradation of both static accuracy (positional correctness at rest) and dynamic accuracy (ability to maintain path under motion and load). Over time, what begins as microscopic shifts compounds into visible quality issues and dimensional variation across batches.
Practical Strategies for Preventive Precision Control
To preserve long-term machine accuracy, manufacturers should integrate the following into routine schedules:
- Establish maintenance intervals based on machine runtime hours, not calendar dates
- Perform regular alignment checks with precision squares, test indicators, or laser calibration tools
- Validate axis squareness and perpendicularity across X/Y/Z axes every quarter
- Inspect and clean linear guides, screws, and taper interfaces to remove buildup
- Monitor servo loads, air pressure, and lubrication flow via diagnostic logs
- Train operators and technicians to identify early mechanical symptoms (vibration, noise, uneven cuts)
Preventive maintenance isn’t just about uptime—it’s a direct investment in consistent accuracy. Machines don’t lose precision overnight, but without structured attention, even the best equipment will fail to meet its original tolerances over time.
10. Signal Transmission Degradation and Sensor Feedback Instability
What Causes Signal and Sensor-Related Accuracy Loss?
Modern CNC machines rely on a wide array of electrical subsystems to maintain precision. These include linear and rotary encoders, tool setters, probe systems, spindle sensors, thermal detectors, and countless meters of signal and power cabling. Over time, these components degrade due to wear, thermal cycling, vibration, and contamination.
Cable insulation can harden or crack, connectors may loosen or oxidize, and shielded cables lose effectiveness against electromagnetic interference (EMI). Likewise, sensors may drift from their original calibration or develop delayed response times due to internal component fatigue. These changes are often subtle and develop slowly, making them difficult to detect without active monitoring.
Complicating the issue, degraded signal paths can behave erratically—sometimes functioning within limits, sometimes not—creating intermittent positioning errors, feedback noise, or motion instability that mimic mechanical issues but are rooted in electronic signal decay.
How Signal Drift and Sensor Failure Affect Machining Accuracy
When transmission quality or sensor precision declines, the following problems can occur:
- Loss of true position feedback from encoders, leading to servo errors or axis overshoot
- Probe triggering drift, causing incorrect workpiece zeroing or tool length offset errors
- Inconsistent data from thermal sensors, affecting real-time compensation algorithms
- Axis “ghost movement” or hesitation due to noisy or unstable signal inputs
- Unexpected variation in fine toolpaths, especially in high-speed or multi-axis machining
These issues may not raise immediate alarms in the control system, but they directly affect machining accuracy, particularly in precision finishing and repetitive tasks. What starts as an electrical inconsistency often translates into geometric error.
Practical Strategies for Managing Signal and Sensor Degradation
To mitigate accuracy loss caused by signal degradation and sensor instability, the following actions are recommended:
- Replace encoder cables and signal lines proactively every 2–5 years, especially in machines with high axis travel
- Clean and re-seat all signal connectors during scheduled maintenance to ensure stable contact
- Use diagnostic tools to detect signal noise, EMI, or encoder drift early
- Verify probe systems against physical standards regularly and recalibrate as needed
- Shield power and signal lines properly to prevent cross-talk or RF interference
- Log and monitor machine error codes for patterns of intermittent feedback faults
Electrical systems often degrade invisibly, but their impact on accuracy is very real. Consistent attention to the condition of cables, connectors, and sensors is essential for maintaining long-term CNC performance.
Conclusion
Precision in CNC machining doesn’t disappear all at once—it erodes over time, often unnoticed, until defects become too costly to ignore. This gradual decline stems not from one singular cause, but from a complex accumulation of thermal shifts, component wear, control drift, and overlooked maintenance. Sustaining long-term accuracy requires more than troubleshooting symptoms—it demands system-level thinking, consistent inspection routines, and a mindset grounded in process discipline. These ten causes, taken together, reveal that preserving precision is not just a technical act, but an operational commitment.
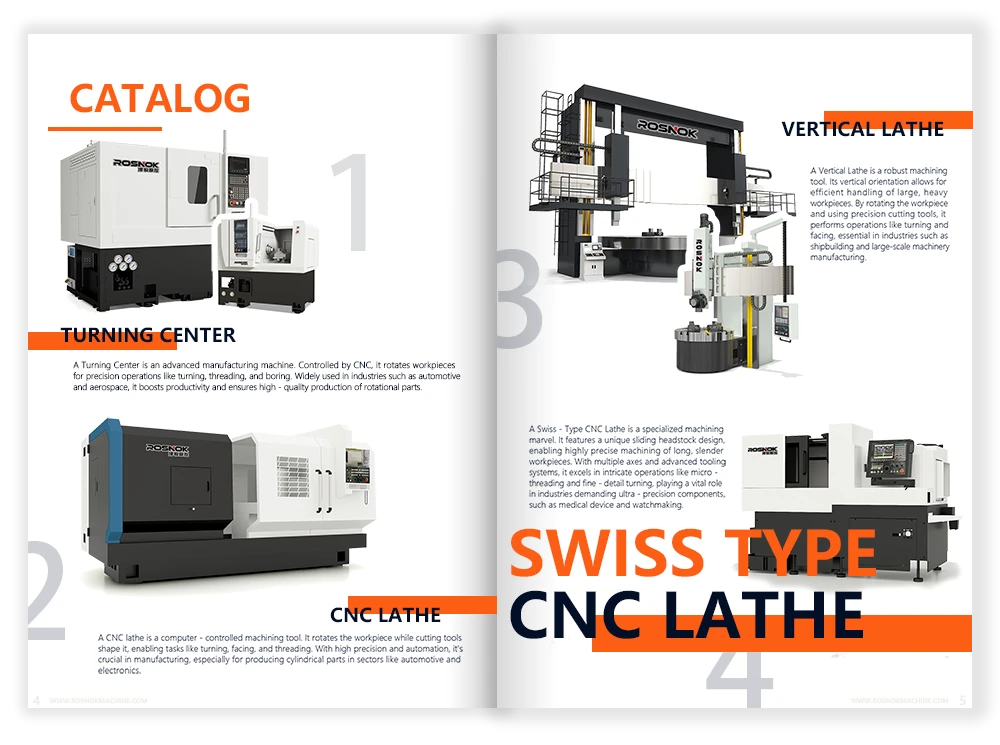
Meeting these challenges requires not only disciplined operations, but also machines that are engineered for longevity at their core. Rosnok designs CNC machines with a clear focus on long-term machining accuracy, addressing structural rigidity, thermal stability, and wear resistance across its CNC lathes, machining centers, vertical lathes, and Swiss-type lathes. Through high-quality components, precise assembly, and long-term support, Rosnok helps manufacturers sustain consistent performance across years of production, even under demanding conditions.
