Lathe threading problems are among the most common challenges faced in CNC machining. Poorly formed threads, inconsistent pitch, or crest deformation can immediately compromise the quality of a part. For manufacturers, even a small error in threading can result in rejected batches, additional rework, and delays in production schedules.
When thread quality is inconsistent, the consequences extend beyond production floor inefficiencies. Assembly failures, leaks in critical pipe connections, or mismatched fasteners can undermine safety and reliability in industries such as automotive, aerospace, and oil & gas. Persistent issues not only slow down manufacturing but also create uncertainty for engineers, operators, and customers who depend on consistent performance.
Fortunately, most lathe threading problems can be identified and resolved with the right methods. This article outlines seven common causes and provides practical solutions to improve accuracy and consistency in threading processes.
Why Thread Quality Matters
Threading is one of the most essential operations in lathe machining, and its accuracy directly determines whether a component will function as designed. Even small defects in pitch, depth, or alignment can cause parts to jam, weaken load-bearing strength, or compromise sealing. In industries such as automotive, aerospace, or oil and gas, these failures can lead to assembly delays, reduced reliability, and serious safety risks.
This is why international standards such as ISO and DIN establish strict tolerances for thread geometry and surface finish. Meeting these requirements ensures that parts remain interchangeable, reliable, and accepted in global supply chains. For manufacturers, consistent thread quality means reduced rework, faster assembly, and stronger customer confidence.

Lathe Threading Problems and How to Fix Them
Lathe threading problems can arise from many different sources, ranging from tool condition to machine setup and process parameters. While some issues appear minor at first glance, they often have serious consequences when scaled up in production. To help manufacturers and engineers address these challenges, the following section highlights seven of the most common threading problems observed in lathe operations, along with practical solutions for preventing and correcting them.
1. Incorrect Thread Pitch
Incorrect thread pitch is one of the most frequent and costly lathe threading problems because it directly prevents proper engagement between mating parts. A pitch error of even 0.05 mm can cause a bolt to seize during assembly or leave a pipe joint too loose to seal under pressure. In quality inspections, this is often the first defect to trigger batch rejection, especially when customers require compliance with ISO 965 or DIN 13 pitch tolerances.
In practice, pitch deviations usually trace back to a few sources. On CNC lathes, synchronization errors between the spindle and feed screw, or small mistakes in G-code programming, are common culprits. On manual lathes, the issue often comes from misaligned change gears or operators engaging the half-nut at the wrong moment. In both cases, the resulting threads may look acceptable at first glance but fail once tested against gauges or during final assembly.
The best defense is consistent calibration and disciplined process control. Lead screws and gears should be inspected for wear, and backlash must be compensated in the control system. Operators should verify pitch settings with thread gauges before running production, rather than relying only on visual checks. In high-volume production, many manufacturers also use in-process measurement tools to catch pitch errors before they multiply across hundreds of parts. By combining preventative maintenance with accurate setup, the risk of pitch errors can be substantially reduced.
2. Inconsistent Thread Depth
Inconsistent thread depth is another common lathe threading problem that directly affects both the strength and functionality of threaded parts. A thread that is too shallow will not have enough engagement, reducing load-bearing capacity and making it prone to stripping. On the other hand, a thread cut too deep can weaken the workpiece, cause excessive stress concentration, or create loose fits during assembly. In industries such as automotive or heavy machinery, either condition can result in premature failure under load.
The root causes of depth variation are often linked to tool compensation errors, unstable workholding, or programming inaccuracies. On CNC lathes, improper tool offset values or incorrect radius compensation can easily shift the cutting depth by tenths of a millimeter. In manual operations, worn cross-slide screws or uneven clamping pressure may lead to irregular cutting passes. Thermal expansion during long production runs can also subtly alter cutting depth if not accounted for in the setup.
To address depth-related issues, manufacturers must rely on both calibration and monitoring. Tool offsets should be verified against test cuts, and thread gauges or micrometers can confirm actual depth before mass production begins. For critical components, in-process inspection ensures that drift is detected early, avoiding large quantities of rejects. Improving workholding rigidity—through better chucks, collets, or steady rests—also minimizes vibration that leads to uneven depth. With these preventive steps, thread depth consistency can be maintained, ensuring reliable engagement and long-term performance.
3. Thread Misalignment
Thread misalignment occurs when the axis of the thread is not concentric with the axis of the workpiece. Even slight angular or positional deviations can create serious problems during assembly. Misaligned threads may bind, cross-thread, or feel loose depending on the direction of the error. In pipe connections, even a fraction of a degree off-axis can prevent proper sealing, while in precision components such as aerospace fasteners, misalignment often leads to immediate rejection during inspection.
The most frequent causes include errors in workholding and machine geometry. On conventional lathes, if the tailstock is not properly aligned with the spindle, the cutting tool will follow an off-center path, producing slanted threads. In CNC environments, misalignment may come from worn guideways, spindle runout, or improper setup of the chuck and fixtures. Over time, vibration and heavy use can also cause subtle shifts in alignment that accumulate into visible defects.
Solving misalignment requires both preventive and corrective measures. First, the machine’s geometric accuracy should be checked regularly—tailstock alignment, spindle runout, and guideway wear are critical parameters to verify. Precision test bars and dial indicators are commonly used for this purpose. Second, workholding must provide stable and concentric clamping; high-quality chucks or collets reduce the risk of axis deviation. For parts where alignment is critical, many manufacturers add a secondary inspection step using coordinate measuring machines (CMMs) to ensure that thread axes meet tolerance requirements. By controlling both setup and machine accuracy, misalignment can be significantly reduced, resulting in consistent, assembly-ready threads.

4. Poor Surface Finish and Burrs
Poor surface finish and burr formation are common lathe threading problems that directly affect assembly quality and long-term performance. Threads with rough flanks create excessive friction during tightening, while burrs at the crest or root can cause galling, seizure, or premature wear. In pipe threads, burrs often prevent proper sealing, leading to leakage under pressure. For high-precision applications such as medical implants or aerospace components, even minor surface defects are unacceptable and will fail inspection immediately.
The primary causes are linked to tool condition, cutting parameters, and chip evacuation. A worn or chipped insert often leaves tearing marks along the flank, while excessive cutting speed without sufficient coolant can burnish the surface instead of cutting cleanly. Inadequate chip control causes material to build up at the tool edge, leaving raised burrs that are difficult to remove. In some cases, incorrect tool geometry—such as a blunt rake angle—also contributes to poor finish.
Addressing surface finish problems requires a combination of tool management and process optimization. Inserts should be replaced before reaching critical wear, and appropriate grades should be selected based on material hardness. Coolant delivery must be adequate, both in flow and direction, to ensure clean cutting and chip removal. For applications demanding superior finishes, manufacturers often employ secondary processes such as thread rolling, deburring, or polishing to refine the final product. By controlling tooling, cooling, and finishing steps, burr formation can be minimized and surface quality consistently improved.
5. Tool Wear and Breakage
Tool wear and unexpected breakage are frequent lathe threading problems that compromise both product quality and production efficiency. A worn insert gradually loses its sharp cutting edge, resulting in rounded thread crests, rough flank surfaces, or inconsistent depth. Breakage is even more disruptive—when a threading tool fractures mid-cut, it not only ruins the part but may also damage the workpiece surface and increase downtime for replacement. In high-volume production, tool failures quickly drive up costs, extend machining time, and reduce batch yield.
The causes of premature wear or breakage vary. Excessive cutting speed, feed, or depth of cut creates high tool loads that accelerate wear and risk fracture. Using the wrong insert grade for a particular material—such as a brittle carbide grade on tough stainless steel—shortens tool life dramatically. Poor coolant delivery contributes to overheating, while chip accumulation around the tool increases friction and thermal stress. In some cases, incorrect toolholder rigidity or excessive tool overhang amplifies vibration, leading to micro-cracks and eventual breakage.
The most effective way to manage tool life is through proactive monitoring and correct process planning. Tool wear should be tracked using inspection microscopes or preset life counters, rather than waiting for failure. Matching insert grade and geometry to the material being cut significantly improves durability. Adequate coolant supply, directed at the cutting edge, reduces heat buildup and prolongs tool life. Finally, minimizing tool overhang and ensuring secure clamping prevents vibration-induced wear. By combining these practices, manufacturers can achieve stable threading performance, reduce costs, and prevent unplanned interruptions in production.

6. Vibration and Chatter During Threading
Vibration and chatter are disruptive lathe threading problems that leave visible waviness on thread flanks and compromise dimensional accuracy. Instead of producing smooth, uniform surfaces, the cutting tool oscillates, creating irregular marks that weaken the thread profile. These defects increase friction during assembly, accelerate wear, and in severe cases, prevent parts from meeting tolerance requirements. While minor surface flaws may pass in general applications, some high-precision industries demand flawless threads, where any sign of chatter disqualifies the part.
Several factors can trigger vibration during threading. Excessive tool overhang reduces rigidity, allowing the tool to flex under cutting loads. Insufficient workholding stability—such as poorly gripping long shafts—exacerbates deflection. Incorrect cutting parameters, particularly excessive spindle speed or feed rate, can also excite natural frequencies of the tool-workpiece system. Over time, worn guideways or loose gibs in the lathe further amplify the tendency for chatter.
To combat vibration, rigidity and process tuning are essential. Tool overhang should be kept as short as possible, and stable toolholders should be used to maximize stiffness. Workpieces that extend beyond the chuck benefit from steady rests or tailstock support to minimize bending. Cutting parameters must be optimized—reducing spindle speed, adjusting feed rate, or using a multi-pass threading strategy can suppress resonance. For CNC machines, advanced controls such as variable spindle speed can further reduce chatter tendencies. By systematically reinforcing rigidity and tuning cutting conditions, manufacturers can maintain clean, accurate threads even on challenging setups.
7. Improper Lubrication or Cooling
Insufficient lubrication or inadequate cooling is a lathe threading problem that often goes unnoticed until defects appear on finished parts. Without proper coolant flow, cutting temperatures rise rapidly, leading to accelerated tool wear, poor surface finish, and increased risk of burr formation. In some cases, heat buildup causes dimensional distortion, making threads fail to meet tolerance even when tool paths are correct. For materials with poor machinability—such as stainless steels or titanium—the absence of effective cooling almost guarantees quality issues.
The main causes typically involve either improper coolant selection or delivery failures. Using a cutting fluid with the wrong viscosity or additives may fail to provide the lubrication required for threading operations. Clogged nozzles, insufficient pressure, or misdirected coolant jets prevent fluid from reaching the tool–workpiece interface, allowing chips to accumulate and heat to build up. In dry machining setups, operators may also underestimate the need for specialized coatings or advanced tooling designed to withstand higher temperatures.
To avoid lubrication-related problems, manufacturers should adopt a systematic approach. Choosing the right cutting fluid—taking into account material type, threading speed, and desired finish—is the first step. Regular maintenance of coolant pumps, filters, and nozzles ensures consistent delivery. For demanding applications, high-pressure coolant systems or through-tool coolant supply can drastically improve chip evacuation and thermal stability. In situations where wet cooling is not feasible, advanced insert coatings or minimum quantity lubrication (MQL) can be applied. By optimizing coolant and lubrication practices, threading reliability can be significantly improved, ensuring both tool longevity and consistent thread quality.

Best Practices to Prevent Threading Problems
Preventing threading issues is always easier than fixing them after production. With the right maintenance, calibration, and process discipline, manufacturers can avoid most lathe threading problems. The following best practices highlight proven ways to keep threading operations stable and reliable.
Establish a Tool Maintenance Plan
Preventing lathe threading problems requires more than fixing issues after they appear. A proactive approach—built on regular maintenance, accurate setup, and disciplined process control—ensures that threads are produced consistently to specification.
Schedule Regular Machine Inspections and Calibration
One of the most effective practices is proper tool management. Inserts should be replaced before critical wear sets in, and toolholders must be checked for rigidity to avoid vibration. Equally important is machine calibration: lead screws, guideways, and spindles should be inspected periodically to prevent drift that leads to pitch or alignment errors.
Optimize Cutting Fluids and Cooling Methods
Process control also plays a key role. Using appropriate cutting fluids in the right quantity and maintaining clean coolant systems keeps temperatures stable and prevents surface defects. For complex or high-volume production, in-process measurement—such as thread gauges, microscopes, or even coordinate measuring machines (CMMs)—can detect deviations early before large batches are affected.
Follow ISO/DIN Threading Standards
Finally, training and documentation are essential. Operators should be familiar with both standard threading procedures and the specific requirements of industries such as automotive, aerospace, or medical manufacturing. Consistent training reduces operator-dependent variability, while documented best practices provide a reference that helps maintain quality across shifts and facilities.
Strengthen Operator Training and Process Optimization
By combining machine care, tool management, process optimization, and skilled operation, manufacturers can significantly reduce the likelihood of lathe threading problems, improve production reliability, and build stronger confidence with their customers.

Conclusion
In threading operations, quality is never determined by a single factor—it depends on the interplay of tooling, machine accuracy, and process control. By recognizing the most common lathe threading problems and applying systematic solutions, manufacturers can avoid recurring defects and ensure consistent performance. The key takeaway is that threading quality is strategic: it defines not only the reliability of each part but also the efficiency and reputation of the entire production line.
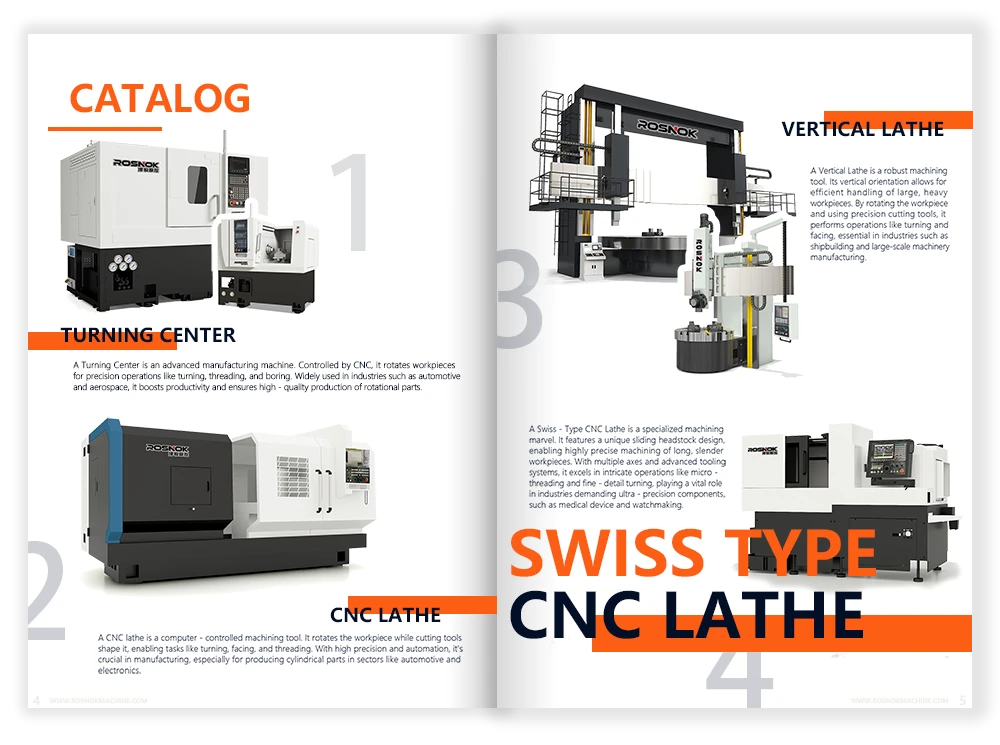
Achieving consistent threading results also depends on having equipment built for precision and durability. Alongside process improvements, manufacturers need machines that maintain accuracy under demanding conditions and support advanced threading methods. This is where Rosnok’s expertise comes in. As a dedicated builder of CNC lathes and machining centers, the company designs equipment to meet international standards while addressing the real challenges of modern manufacturing. By combining reliable machine performance with responsive support, Rosnok helps manufacturers turn best practices into consistent production outcomes.


