The preparation of your CAD File for CNC Machining is the foundation of production success. This guide details the essential features of formats like STEP and IGES, guaranteeing your complex geometry is accurately preserved. By eliminating the costly errors and data loss common with generic formats, you ensure smooth data transfer to the machine. The result is a seamless, first-time-right machining process that delivers high-precision parts and dramatically cuts down on your production time and material waste.
What Are CAD Files in CNC Machining?
Computer-Aided Design files, or CAD files, are digital blueprints that describe every feature, edge, and dimension of a part. They show how a component looks, fits, and functions before it is manufactured. These files form the foundation of modern engineering, allowing designers to visualize and test ideas before sending them to production.
To create CAD files, engineers use specialized software such as SolidWorks, AutoCAD, or Fusion 360. Depending on the project, these files can be 2D—for flat parts like plates and brackets—or 3D, when the design includes curves, holes, and complex shapes. In CNC machining, 3D models are most common because they provide the full geometry required for accurate toolpaths.
CAD files are directly linked to the CNC process. Before any machining begins, the model must be exported into a compatible format such as STEP (.stp), IGES (.igs), or DXF (.dxf). These formats allow the machine to interpret shapes, surfaces, and dimensions correctly. If a file is incomplete or uses the wrong format, programming errors or shape distortions can occur.
Beyond design, CAD files help manufacturers validate parts before production. Engineers can check clearances, simulate stress, or identify potential machining issues early. This reduces trial-and-error on the shop floor and shortens the time between design and finished part. In short, accurate CAD files keep your CNC workflow efficient, predictable, and cost-effective.
Common CAD File Formats for CNC Machining
Before any machining begins, the CAD file acts as the bridge between design and production. The accuracy of that bridge depends on how the file’s geometry, units, and features are stored and interpreted by different CAM systems. Using the right file format helps protect design intent, avoid geometry loss, and ensure smooth CNC operations from start to finish.
STEP (.stp or .step)
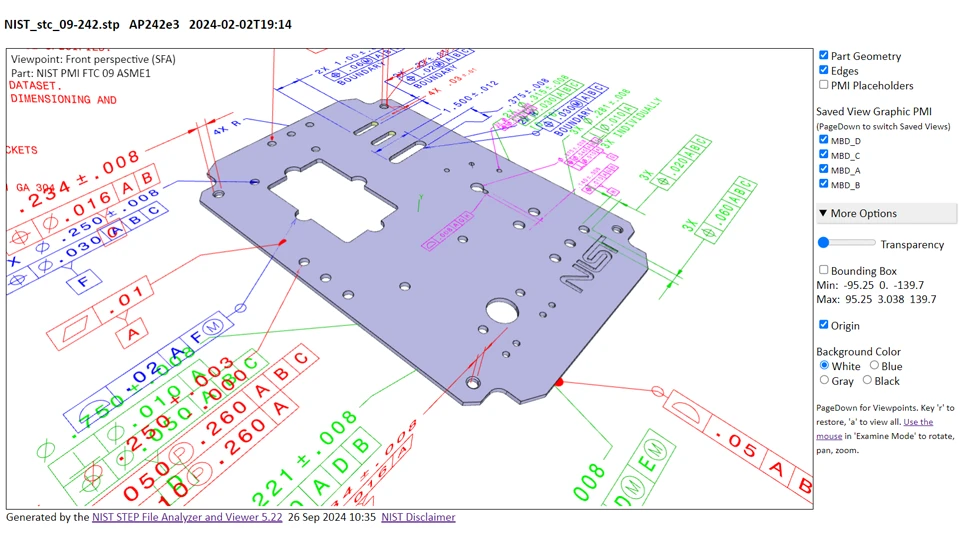
The STEP file format has become the global standard for 3D data exchange in CNC machining. Developed under ISO 10303, it supports solid and surface geometry, assemblies, and product manufacturing information (PMI). STEP files accurately preserve a part’s shape, units, and tolerances, making them ideal for high-precision machining and multi-axis operations.
Manufacturers prefer STEP because it ensures consistent geometry across different CAD and CAM platforms. It maintains solids as watertight bodies, preventing translation errors like missing faces or gaps that can occur in older formats. In modern workflows, STEP AP242 is especially valued because it includes metadata such as materials, colors, and GD&T annotations.
For most CNC projects, exporting a design as a STEP file provides the best balance of precision, stability, and interoperability. It’s the safest way to share models with vendors, as nearly every software—from SolidWorks to Fusion 360—can open it without distortion.
IGES (.igs or .iges)
The IGES format dates back to the early 1980s and was once the dominant neutral exchange file in the CNC industry. It allows designers to share geometric data between different CAD systems, supporting wireframe, surface, and solid models. IGES remains in use today, especially for legacy components or systems that have not transitioned to STEP.
Despite its history, IGES has limitations. It often converts models into separate surface patches that must be rejoined manually in CAM software, which can cause gaps or open edges. When machining free-form or contour-heavy parts, these imperfections can lead to toolpath errors. However, for simple parts or older machines, IGES still performs reliably.
If your shop deals with older files or needs maximum backward compatibility, IGES remains useful—but for new projects, STEP is almost always the better choice.
DXF (.dxf)
DXF is a 2D CAD format widely used in manufacturing for flat profiles and sheet-metal cutting. It stores geometric elements such as lines, arcs, and splines in a flat plane, making it perfect for laser, plasma, and waterjet cutting applications. Many engineers also use DXF to define pockets, holes, or engraving paths in simple 2.5D milling.
Because of its simplicity, DXF files are easy to generate, lightweight, and compatible with nearly all CAM software. However, they don’t include 3D data or thickness information, so they should be used only for flat designs. Problems like duplicated lines or unit mismatches can occur if files aren’t cleaned before export.
When used correctly, DXF offers a fast, reliable way to transfer 2D geometry from design to machine, especially in high-volume cutting operations.
DWG (.dwg)
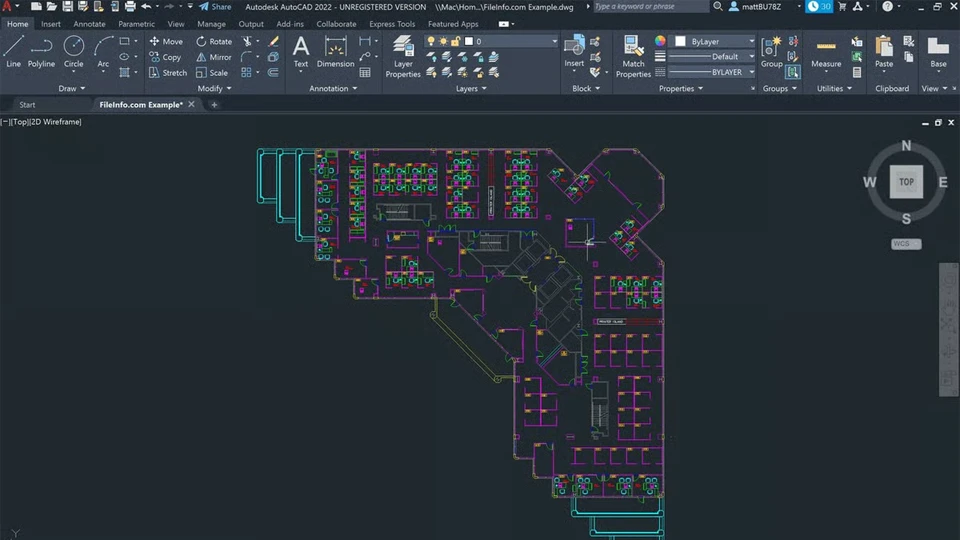
DWG is AutoCAD’s native file format and one of the most recognizable in the CAD industry. It supports detailed 2D drawings and limited 3D solids, including dimensions, layers, and annotations. Many shops still receive DWG files for quoting, layout, or production documentation.
Although DWG works well for design and drafting, most CAM systems prefer neutral formats like DXF or STEP for machining. DWG’s embedded metadata and scaling features can cause compatibility issues during import. To ensure consistent results, engineers typically convert DWG files to DXF for 2D machining or to STEP for 3D parts.
DWG remains valuable for communication and design reviews but should be treated as a reference format, not a machining-ready file.
Parasolid (.x_t or .x_b)
Parasolid is a highly accurate geometric modeling format developed by Siemens and used by many advanced CAD systems such as NX, Solid Edge, and SolidWorks. It defines solid and surface geometry with excellent precision and stability, which makes it particularly well-suited for CNC machining of tight-tolerance parts.
When both the design and CAM software use the Parasolid kernel, data transfers are nearly flawless—geometry remains watertight, faces stay connected, and no translation is needed. This makes Parasolid a top choice for precision manufacturing environments. However, outside Siemens-based systems, compatibility may be limited, so it’s best used when both ends of the workflow share the same kernel.
In short, Parasolid offers unmatched accuracy and stability when system compatibility allows it.
STL (.stl)
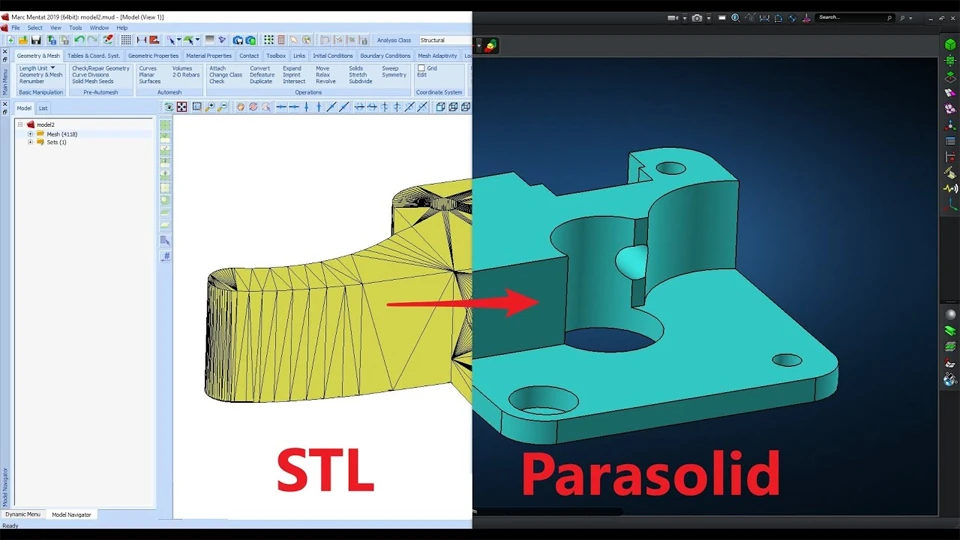
STL files represent 3D geometry using a mesh of small triangles. They are excellent for 3D printing, scanning, and visualization but less ideal for CNC machining. Because STL doesn’t store units, tolerances, or solid features, curved surfaces may appear faceted, and fine details can be lost.
That said, STL can still be useful in hybrid workflows—for example, when reverse-engineering a scanned part or checking fit before machining. The key is using a fine mesh resolution and verifying units before toolpath generation.
In most cases, STL should be treated as a visualization or reference model, not a primary file for machining operations.
SolidWorks (.sldprt, .sldasm)
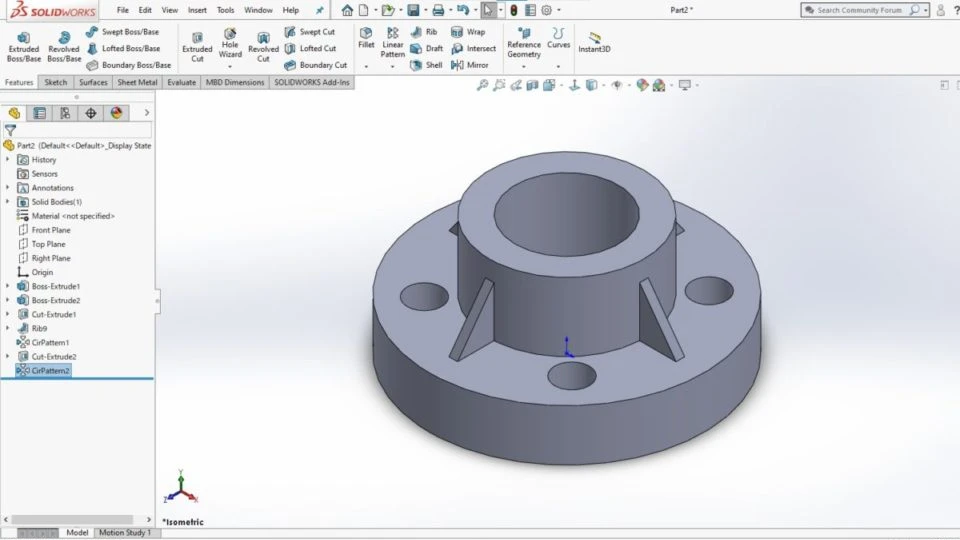
SolidWorks is one of the most popular CAD platforms in manufacturing. Its native part and assembly files store the full design history, including sketches, features, and material properties. Within a SolidWorks environment, these files are ideal for design iteration and simulation.
However, when sharing with external partners or machine shops, exporting to STEP or IGES is strongly recommended. Native SolidWorks files are version-dependent, meaning older CAM software may not open them correctly. By converting to a neutral format, you ensure geometry integrity and smooth data exchange.
SolidWorks native files are excellent for design development, but for manufacturing, always export to a neutral 3D format to maintain precision.
CATIA (.CATPart, .CATProduct)
CATIA is widely used in aerospace, automotive, and industrial equipment design, where complex surfaces and assemblies are common. It handles advanced geometry, multi-body solids, and high-level PMI data with exceptional accuracy.
However, CATIA’s native files are large and not easily opened outside Dassault’s ecosystem. When machining CATIA parts, it’s best to export them as STEP AP242 files to retain precision and annotations. Some companies even maintain a “CATIA master” and a “STEP manufacturing” version of the same model to ensure consistent machining results.
For industries requiring intricate surfacing and long product life cycles, CATIA remains unmatched—but sharing in neutral formats is essential for cross-platform manufacturing.
CAD File for CNC Machining: Performance Breakdown
Understanding the strengths and limitations of different CAD file formats is essential for achieving precision and consistency in CNC machining. Each format behaves differently when transferred between CAD and CAM systems—some maintain perfect geometry, while others may distort data or lose critical design details. Below is a performance-based evaluation of the most common file formats used in CNC manufacturing, measured through six key engineering dimensions.
Compatibility and Data Portability
File compatibility determines how easily a design can move between software systems without losing fidelity. Among all formats, STEP (.stp, .step) is the most portable. It’s widely accepted across virtually every CAD and CAM platform and supports assemblies, materials, and colors. This universality makes STEP the default choice for shops working with multiple software ecosystems.
IGES (.igs, .iges) follows closely in compatibility but suffers from instability. While nearly every program can open IGES files, they often import as fragmented surfaces that need manual repair. Parasolid (.x_t, .x_b) delivers seamless compatibility within Siemens-based systems (NX, Solid Edge) but is less versatile across platforms. DXF (.dxf) dominates in 2D workflows for laser or plasma cutting, offering near-universal readability. Native formats like SolidWorks (.sldprt) and CATIA (.CATPart) perform best inside their own ecosystems, while STL (.stl) remains readable everywhere—but its simplicity comes at the cost of accuracy.
For most CNC operations, STEP strikes the ideal balance between openness, stability, and feature preservation.
Geometry Precision and Surface Integrity
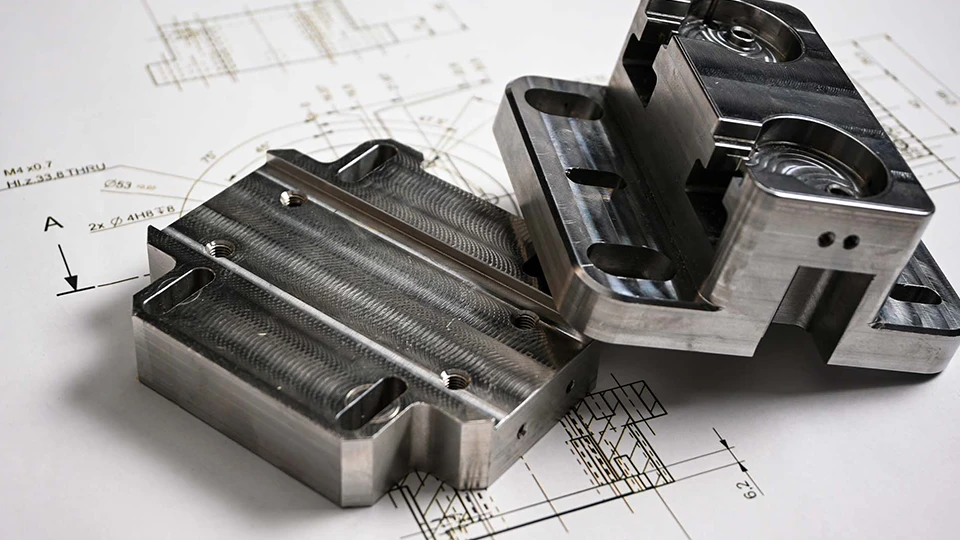
Geometric fidelity defines how accurately a file represents a part’s surfaces, edges, and curves. In this category, STEP and Parasolid outperform others by maintaining watertight solids with precise surface continuity. STEP preserves true NURBS-based geometry, while Parasolid provides the most stable representation of topology—particularly beneficial for machining freeform surfaces and tight-tolerance features.
IGES lags behind due to its surface-based approach, which can lead to small gaps or misaligned patches during import. These errors translate directly into toolpath interruptions or unwanted cutter marks. STL, meanwhile, replaces curves with triangle meshes. Although fine-resolution STLs can look accurate visually, they lose true curvature information, causing potential rounding errors during machining.
If dimensional accuracy and surface finish are priorities—as in aerospace, medical, or precision mold manufacturing—STEP or Parasolid should always be the preferred format.
Parametric and Feature Data Retention
Not all CAD files store the same level of design intelligence. Native files from software like SolidWorks and CATIA retain full parametric data: sketches, constraints, and feature trees. This makes them ideal for iterative design, but risky for external collaboration—partners may not have compatible software versions.
STEP AP242 has improved this by supporting limited Product Manufacturing Information (PMI), such as tolerances and GD&T. It doesn’t keep the full feature tree but carries essential metadata for manufacturing. IGES and STL, in contrast, contain no design intent—only static geometry. Parasolid keeps solid definitions but not parametric logic.
For collaboration between design and machining teams, STEP AP242 offers the best compromise—maintaining geometry and limited annotation while avoiding version conflicts from native formats.
File Size, Complexity, and Processing Efficiency
A file’s size and computational load affect both data handling and CAM performance. DXF files are compact and lightweight, making them perfect for fast 2D operations. Parasolid is also efficient, storing solid geometry in a compact binary form that loads quickly in compatible systems.
STEP files tend to be larger, especially for complex assemblies, but remain manageable with modern hardware. IGES, by contrast, can bloat significantly due to its patch-based structure, slowing down import times. STL files grow exponentially with higher mesh resolution—doubling precision can quadruple file size—making them impractical for large or detailed parts.
In large-scale or multi-axis projects, efficient file management directly translates to faster toolpath generation and smoother workflow. For balance between accuracy and performance, STEP and Parasolid again lead the pack.
Manufacturing Readiness and CAM Compatibility
CNC machinists value formats that “just work” when imported into CAM. STEP is the most machining-ready format, often requiring no geometry repair. Its solid bodies import cleanly into CAM software, ready for direct toolpath generation. Parasolid performs equally well when both CAD and CAM share the same kernel, offering zero data loss between stages.
IGES frequently requires manual cleanup—rejoining faces, stitching surfaces, or repairing gaps—before the model is machinable. STL is useful for toolpath simulation or 3D scanning workflows but not suitable for actual machining unless re-engineered into solids. DXF remains the go-to format for 2D cutting, engraving, and nesting jobs.
For most modern manufacturing pipelines, STEP remains the most reliable all-around choice, minimizing CAM preparation time and ensuring dimensional accuracy from design to part.
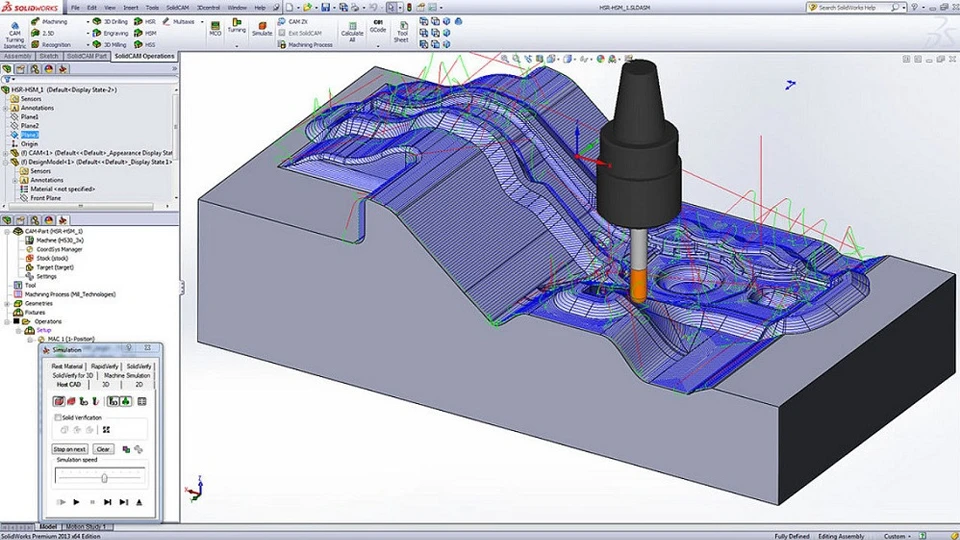
Recommended Applications by File Type
Each CAD format has its own sweet spot in the CNC workflow:
- STEP (.stp, .step) → Best for cross-platform collaboration, 3D machining, and complex assemblies.
- IGES (.igs, .iges) → Useful for legacy systems or surface-only designs.
- Parasolid (.x_t, .x_b) → Excellent for high-precision machining in Siemens-based systems.
- DXF (.dxf) → Ideal for 2D laser, plasma, or waterjet cutting.
- STL (.stl) → Limited to visualization, reverse engineering, or hybrid additive/subtractive processes.
- SolidWorks/CATIA native files → Best within their ecosystems for design iteration, not for vendor transfer.
When in doubt, export STEP AP242—it’s the most universally supported and production-ready option available today.
CAD File Performance Comparison Table
| File Format | Compatibility | Geometry Accuracy | Parametric Data | File Efficiency | CAM Readiness | Ideal Application |
|---|---|---|---|---|---|---|
| STEP (.stp, .step) | ★★★★★ Universal across CAD/CAM | ★★★★★ Preserves solids and surfaces | ★★★★☆ Supports PMI (AP242) | ★★★★☆ Moderate file size | ★★★★★ Machining-ready | Cross-platform 3D parts & assemblies |
| IGES (.igs, .iges) | ★★★★☆ Very compatible, but unstable | ★★☆☆☆ Risk of gaps and open edges | ★☆☆☆☆ None | ★★☆☆☆ Large, slow import | ★★☆☆☆ Needs healing | Legacy data, simple surface models |
| Parasolid (.x_t, .x_b) | ★★★★☆ Best in Siemens ecosystem | ★★★★★ Excellent solid topology | ★★★☆☆ No full feature tree | ★★★★★ Compact binary | ★★★★★ Excellent for precision | High-tolerance, Siemens-based workflow |
| DXF (.dxf) | ★★★★★ Universal for 2D | ★★★☆☆ Exact for flat geometry | ★★☆☆☆ Limited annotations | ★★★★★ Lightweight | ★★★★★ Direct-to-CAM | Laser/plasma cutting, engraving |
| STL (.stl) | ★★★★★ Readable everywhere | ★★☆☆☆ Faceted, not true surfaces | ★☆☆☆☆ None | ★★☆☆☆ Heavy at fine mesh | ★★☆☆☆ Visualization only | 3D printing, scanning, hybrid use |
| DWG (.dwg) | ★★★★☆ Common in AutoCAD | ★★★☆☆ Accurate 2D, limited 3D | ★★☆☆☆ Minimal design data | ★★★☆☆ Medium | ★★★☆☆ Often needs conversion | 2D drawings, layout references |
| SolidWorks (.sldprt) | ★★★☆☆ Native only | ★★★★★ Full-precision solids | ★★★★★ Complete parametrics | ★★★☆☆ Medium | ★★★★☆ Good in same ecosystem | Design development within SolidWorks |
| CATIA (.CATPart) | ★★★☆☆ Limited outside CATIA | ★★★★★ Excellent surfacing | ★★★★★ Full parametrics | ★★★☆☆ Heavy for assemblies | ★★★★☆ Stable within Dassault tools | Aerospace, automotive complex parts |
How to Prepare a CAD File for CNC Machining
A perfect CAD model doesn’t automatically translate to a perfect machined part. Before sending a design to production, engineers must ensure that the CAD data is clean, accurate, and manufacturable. Preparing the file correctly reduces CAM setup time, prevents machining errors, and ensures that the finished component reflects the design intent.
Review and Finalize Design Intent
Before exporting any model, start with a full design review. Eliminate redundant sketches, unused reference bodies, and hidden construction geometry. Verify that all critical features—holes, threads, chamfers, and pockets—are correctly defined with the proper tolerances.
Ensure that the model reflects how the part will actually be manufactured. Check that small radii, thin walls, and deep cavities are within machining capability. Orient the part relative to a logical datum or fixture point. A clearly defined coordinate system minimizes setup confusion and improves repeatability across machines.
A clean, well-structured model is easier to translate and reduces downstream interpretation errors during CAM programming.

Validate Units and Scale
Unit mismatch is one of the most common and expensive mistakes in CNC machining. Always verify whether your CAD system is working in millimeters or inches, and ensure this setting matches your vendor’s CAM environment.
To prevent scaling errors, explicitly set the default units before exporting. Label files clearly (e.g., “Bracket_6061_mm.step”) and include units in both the filename and accompanying documentation. When in doubt, re-import the exported file into your CAD software and measure a known feature. If dimensions align with your intent, you’re safe to proceed.
Proper unit validation ensures that a 10 mm hole doesn’t accidentally become 10 inches—a surprisingly frequent and costly error in cross-border manufacturing.
Simplify and Clean Geometry
The best machining data is simple, solid, and clean. Run geometry checks or “healing” tools within your CAD software to remove small gaps, duplicate faces, or non-manifold edges. For imported files like IGES or STEP, inspect all surface boundaries and confirm the solid is watertight.
Simplify models wherever possible. Remove tiny fillets, embossed logos, and text engravings that don’t affect part function. These details can increase toolpath calculation time and create unwanted tool motion. If they’re necessary for branding, machine them as secondary operations.
A simplified model means faster CAM processing, fewer toolpath errors, and better control over machining strategy.
Apply Tolerances and Critical Features
Machinists can only deliver precision if they know where it matters. Add tolerances and GD&T callouts for critical dimensions such as bores, fits, and mating surfaces. Use Product Manufacturing Information (PMI) if your CAD software supports it, or provide a 2D PDF drawing with clearly marked tolerances.
If threads are required, model them physically only if needed for simulation—otherwise, call them out as annotations. This keeps the file lightweight and easier to process. Clearly define datum references and surface finishes so machinists understand functional intent.
The clearer your manufacturing data, the faster and more confidently the machine shop can program the part.
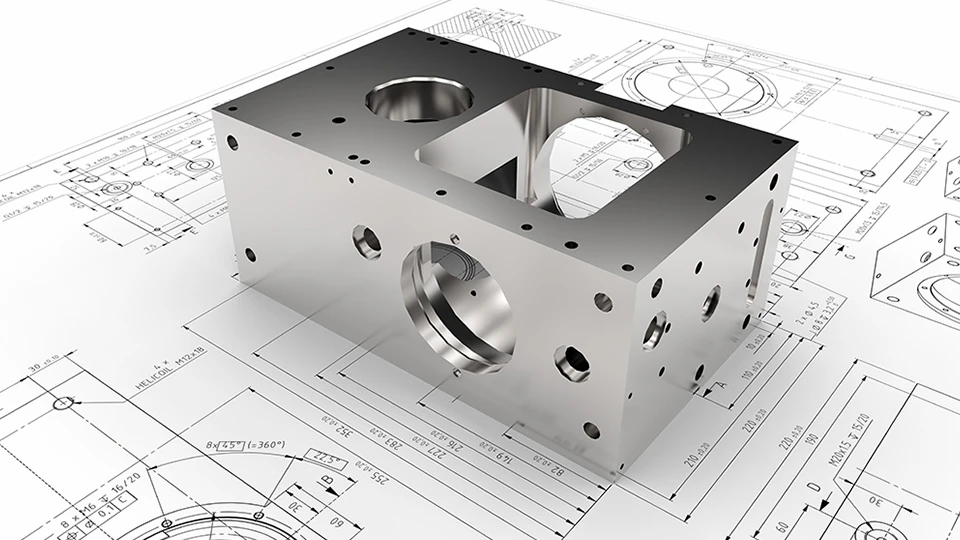
Organize Assemblies and Naming
For assemblies, maintain consistent and logical file structure. Suppress non-machined components such as fasteners and gaskets before exporting. Use a single coordinate system for all related parts to prevent orientation mismatches during CAM setup.
Adopt meaningful file naming conventions that include revision level, material, and project reference—for example:GearHousing_R2_7075_STEP.stp.
This eliminates confusion when multiple versions exist and simplifies traceability during production.
Well-organized assemblies speed up quoting, fixture design, and toolpath planning.
Optimize Export Settings
Each CAD format has its own export nuances that directly affect machining accuracy. For STEP, choose AP242 for maximum data richness. Enable “heal geometry” or “solid body only” options to prevent open surfaces. For IGES, tighten surface tolerances and check for trimmed edges. For STL, reduce chord height and angular tolerance to minimize faceting.
Always perform a “round trip” check—export your file, re-import it, and visually inspect for missing geometry or flipped surfaces. This simple step catches 90% of data transfer issues before they reach the shop floor.
Communicate Clearly with the Machinist
Even the cleanest CAD file can fail if manufacturing intent isn’t clear. When sending files, include a README or manufacturing note that outlines:
- Units of measure
- Material type and grade
- Surface finish requirements
- Tolerances and fits
- Post-processing steps (e.g., anodizing, heat treatment)
Pair your CAD file with a 2D PDF reference drawing. This helps machinists cross-check dimensions, ensuring no ambiguity during toolpath programming.
Good communication turns a technically correct file into a practically perfect part.
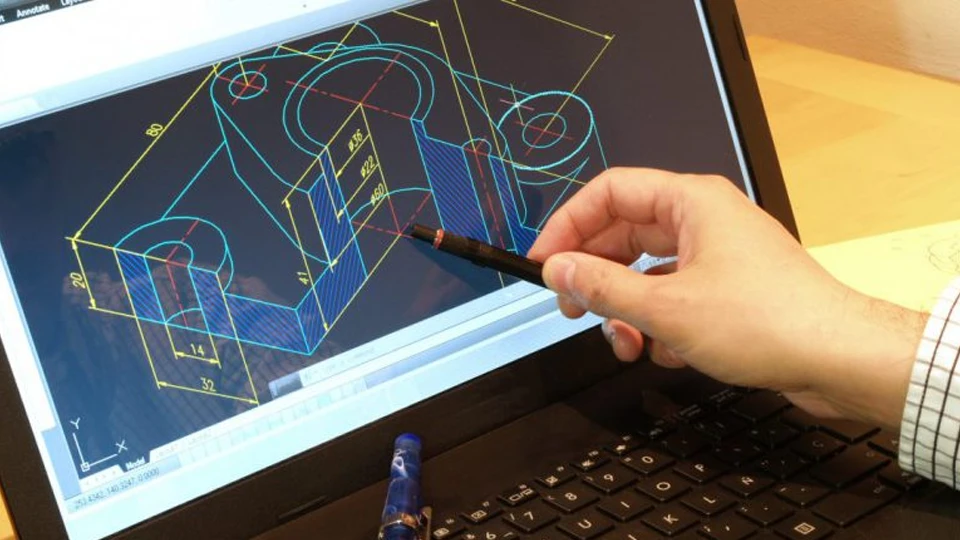
Common CAD File Conversion and Data Compatibility Issues
Translating a CAD model from one format to another sounds simple—but it’s often where precision gets lost. Even small compatibility errors can cause hours of rework on the shop floor. Understanding what typically goes wrong, why it happens, and how to prevent it is essential for keeping your machining data accurate and reliable.
Common Issues in CAD File Conversion
Even well-prepared CAD files can run into trouble during format conversion. Here are the most frequent problems engineers face and what they look like in practice:
- Geometry distortion and broken surfaces – Smooth curves become segmented or surfaces detach, often visible as gaps or twisted faces after import into CAM.
- Lost tolerances and annotations – GD&T, thread data, or material specs disappear when exported into formats that don’t support PMI (e.g., IGES, STL).
- Unit mismatch and scaling errors – Files created in inches are interpreted as millimeters (or vice versa), causing instant 25.4× scaling and scrapped parts.
- Assembly reference misalignment – Components shift position due to inconsistent coordinate systems or missing constraints in multi-part exports.
- Excessive file size and slow performance – Conversions—especially with complex assemblies or high-res meshes—cause files to bloat, slowing toolpath generation or crashing CAM software.
These issues all stem from how geometry, metadata, and kernel logic translate between CAD systems—but every one of them can be predicted and prevented.
Root Causes Behind Data Loss and Distortion
Most conversion errors start at the kernel level—the mathematical engine that defines geometry inside CAD systems. For example, SolidWorks and NX both use Parasolid, while CATIA relies on CGM. When exporting from one kernel to another, small differences in how surfaces are defined can cause rounding errors or gaps. That’s why a perfectly smooth curve in one system may appear faceted or broken in another.
Another frequent cause is tolerance mismatch. CAD software defines model precision differently: one might store geometry to six decimal places, another to four. When data moves between systems, low tolerance settings can drop minute but critical details, such as thread pitch or fillet transitions.
Unsupported metadata also leads to data loss. Not all file types carry PMI, material, or assembly data. For instance, exporting from SolidWorks to IGES strips out most annotations, while STEP AP242 retains them. Finally, poor export settings—like leaving “surface mode” enabled instead of “solid mode”—can result in unstitched bodies that must be manually repaired in CAM.
In short, conversion errors are not random—they stem from predictable gaps between software kernels, tolerance precision, and export configuration.
Practical Solutions to Ensure Data Integrity
To prevent conversion headaches, start by choosing the right neutral format. For most CNC workflows, export as STEP AP242, which supports solids, colors, materials, and PMI. If both design and CAM use the same kernel (e.g., Parasolid), share native Parasolid files to ensure perfect geometry continuity. Avoid using IGES unless necessary for legacy compatibility.
Next, fine-tune export settings. Always export as solids rather than surfaces, and enable healing or repair tools. Use a tight tolerance (0.001 mm or better) to preserve geometry accuracy. Explicitly set units and check that coordinate systems align with your machining setup.
Before sending the file, perform a round-trip validation: export, re-import, and measure key features against the original. This step catches 90% of conversion errors before they reach production. Finally, provide a reference drawing or 3D PDF showing tolerances and surface finishes—this bridges any remaining metadata gap between systems.
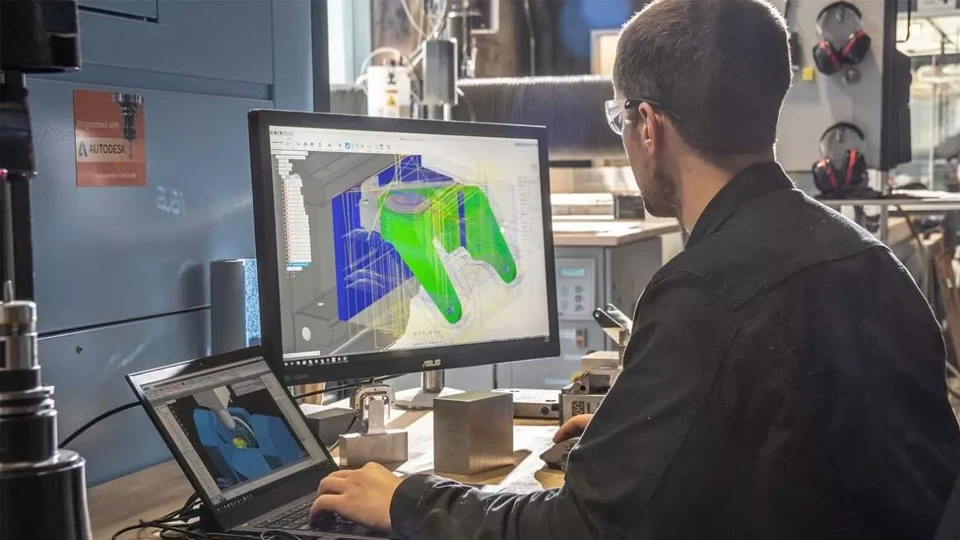
Best Practices for Managing CAD Data in CNC Workflows
Efficient CAD data management is the backbone of every successful CNC workflow. Poorly organized models, unclear version control, or inconsistent file standards can turn precision machining into guesswork. Establishing a disciplined data process helps teams save time, maintain accuracy, and reduce costly rework.
Below are the key practices that professional machining teams follow to keep design and production data synchronized and error-free.
Establish File Naming and Revision Standards
Clear file naming is the first step toward reliable collaboration. Each file should carry enough information to identify its version, material, and part type at a glance.
A strong naming convention might look like this:ProjectCode_PartName_Rev#_Material_Format
Example: AXL200_GearHousing_R2_7075_STEP.stp.
Always include revision levels and enforce consistent naming across design, CAM, and production environments. When multiple versions circulate, even a single outdated file can lead to scrap or reprogramming.
Use a simple rule: if it isn’t named correctly, it isn’t ready for production.
Maintain a Centralized Data Repository
Scattered files are a leading cause of machining errors. Store all CAD, CAM, and documentation files in a centralized, access-controlled system—such as a network drive or Product Data Management (PDM) platform.
Each project folder should contain:
- The latest approved CAD model
- CAM programs and post files
- Setup sheets and manufacturing notes
- PDFs of 2D drawings with revision control
Keeping everything in one location ensures that machinists, programmers, and engineers are always working with the same, validated data. It also provides traceability if revisions need to be audited later.

Standardize File Formats for Communication
Consistency in file types prevents conversion problems. Decide early which formats your organization uses for design, quoting, and manufacturing. For instance:
- STEP AP242 for external collaboration and machining
- DXF for 2D cutting or laser work
- Native files (SolidWorks, CATIA) for internal design iterations
Communicate this standard to all partners and vendors. It ensures that everyone speaks the same “data language,” minimizing translation errors and wasted preparation time.
Implement Geometry and Unit Verification Protocols
Before machining, every CAD file should undergo a standardized geometry check. This involves verifying:
- Units of measurement (mm/inch consistency)
- Coordinate system alignment
- Solid integrity (no open surfaces or duplicated geometry)
- Tolerance validation on critical dimensions
Use built-in CAD validation tools or third-party inspection software. Treat this step as part of the machining process—not as optional quality control. A simple geometry audit can catch the errors that cause days of rework later on.
Document and Communicate Manufacturing Intent
Even the most accurate CAD file fails if intent is misunderstood. Pair every exported file with clear documentation: material type, surface finish, heat treatment, and any special machining notes.
Where possible, include this information directly in the CAD file as Product Manufacturing Information (PMI). For older systems, attach a PDF drawing or text note. Encourage machinists to cross-check geometry against documentation before programming.
Conclusion
Precision in CNC machining doesn’t happen by chance—it’s engineered. Every successful workflow begins with disciplined CAD preparation: choosing the right format, defining tolerances clearly, validating geometry, and confirming units before export. These details are not administrative tasks; they are the foundation of dimensional accuracy, surface quality, and production efficiency. When handled correctly, they eliminate rework, shorten setup time, and ensure the machined part matches the model on the first run.
At Rosnok, this approach defines how we design and manufacture our CNC equipment. Every lathe, machining center, and precision system we produce is built on the same data-driven logic: geometry integrity, consistency between CAD and CAM, and repeatable accuracy on the shop floor. The same best practices that make a CAD file reliable are embedded in how our machines cut, measure, and verify. For us, good data isn’t theory—it’s the reason our customers achieve precision that lasts.
