Have you ever looked at your lathe and wondered how to start milling on a lathe? Are you feeling lost, unsure where to begin, or frustrated by not knowing the right steps? Do you wish there was a clear, beginner-friendly method to unlock more power from your lathe—without having to buy expensive new equipment?
Milling on a lathe starts with installing a milling attachment or live tooling on your lathe’s tool post. First, secure the workpiece in the chuck. Then, mount a rotating end mill using a tool holder or spindle-driven attachment. Align the tool precisely with the cutting surface, and lock all slide movements not in use. Start the spindle, set proper feed rate, and begin cutting by advancing the tool slowly into the workpiece. Always use cutting fluid and check alignment for accuracy.
Continue reading this article to learn how to milling on a lathe, including the tools you need, proper setup methods, key cutting techniques, and practical safety tips.
Understanding the Basics of Milling on a Lathe
Milling on a lathe can feel counterintuitive to many beginners, especially those who are familiar with the idea that turning and milling are entirely separate processes. However, with the right configuration, a lathe can be adapted to perform various milling operations without needing a dedicated milling machine. Understanding how this transformation is possible begins with knowing the difference between the two processes and how structural adjustments make milling on a lathe achievable.

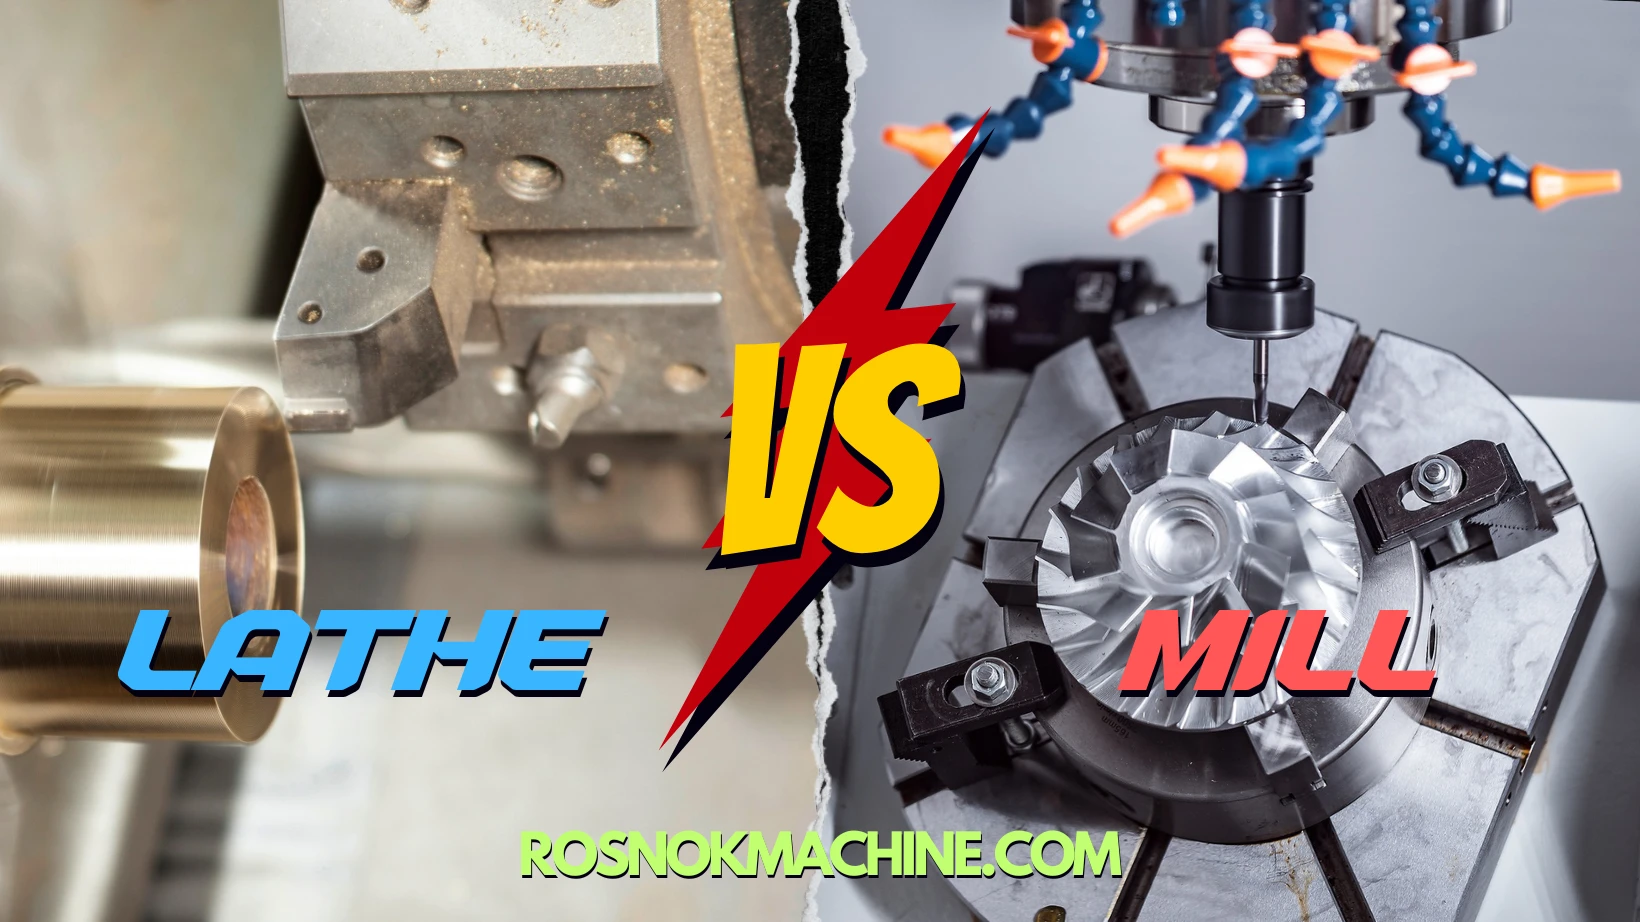
The Difference Between Turning and Milling
Turning and milling are both subtractive machining processes, but they are built on very different motion principles. In turning, the workpiece rotates while the cutting tool stays fixed or moves along a guided path. This is excellent for creating cylindrical shapes and symmetrical components such as shafts, sleeves, and discs.
Milling, on the other hand, involves a rotating tool that cuts into a stationary or slowly moving workpiece. This method is used to produce flat surfaces, slots, keyways, and complex contours. Despite these differences, both methods remove material, and when combined on the same machine, they greatly expand the capabilities of a standard lathe. For anyone learning how to mill on a lathe, recognizing this distinction is the first step to understanding how the process works.
What Makes Milling on a Lathe Possible
What enables milling on a lathe is a structural modification that allows the cutting tool to rotate, rather than the workpiece alone. In conventional turning, the spindle drives the workpiece, but when milling attachments or live tooling systems are added, the tool itself gains rotational motion. This reversal of roles makes it possible to perform milling operations on a lathe machine.
Many modern CNC lathes come with built-in live tooling capabilities, allowing for automatic rotation of end mills and drill bits. For manual setups, external milling heads can be mounted to the carriage or cross-slide. Once aligned correctly, this setup allows for precise cutting, drilling, or slotting—making milling on a metal lathe both practical and efficient. With careful planning and proper equipment, even traditional lathe operators can explore the benefits of milling without switching machines.
Types of Lathes Suitable for Milling
Not every lathe is designed to handle milling operations, but with the right features, many types can be adapted for light to moderate milling tasks. Choosing a suitable lathe for milling on a lathe depends on the machine’s rigidity, precision, and compatibility with tool attachments. Beginners should first understand the major categories of lathes and which ones are better suited for performing basic milling tasks without compromising safety or accuracy.
Manual Lathes
Manual lathes are commonly used in workshops and schools for basic turning operations. While they are not built for milling by default, they can be upgraded with milling attachments that mount to the compound rest or cross-slide. These attachments often include a small rotating spindle where end mills can be installed. However, because manual lathes lack Y-axis movement and real-time feedback systems, milling accuracy and repeatability can be limited. Manual setups are best suited for simple slotting or face milling on soft materials. For beginners experimenting with milling on a lathe, a manual lathe with a quality attachment offers a low-cost entry point.
CNC Lathes with Live Tooling
CNC lathes equipped with live tooling are specifically designed for combined turning and milling operations. These machines allow the cutting tool to rotate under program control while the workpiece remains stationary or rotates at low speed. Common in advanced workshops and production environments, these lathes often include a Y-axis and C-axis, giving users the ability to perform complex milling operations on a lathe machine. This includes drilling off-center holes, contour milling, and even thread milling. When properly set up, CNC lathes with live tooling are highly efficient and capable of delivering precise results with minimal manual intervention.
How to Check If Your Lathe Is Compatible
Before attempting any milling operation on lathe equipment, it’s important to assess the machine’s mechanical and structural capabilities. Start by checking the overall rigidity of the bed and carriage—milling generates side loads that traditional turning operations do not. The spindle speed range and available torque also matter, as milling typically requires slower speeds but higher cutting forces.
Make sure the tool post or turret can securely hold attachments or live tools, and verify that there’s enough clearance around the work area for tool movement. If the lathe allows mounting a milling head or driven spindle, and if the controls can manage tool speed independently, your machine is likely compatible. For beginners interested in milling on a metal lathe, starting with simpler tasks and gradually upgrading tooling is the most effective way to explore the machine’s full potential.

Essential Tools and Equipment for Lathe Milling
To perform successful milling on a lathe, the machine itself is only one part of the equation. The right tools and supporting equipment are equally important. Without proper tool holders, cutters, and workholding devices, even a capable lathe cannot achieve accurate results. This section introduces the key tools needed to carry out safe and effective milling operations on a lathe, especially for beginners working on basic setups.
Milling Attachments and Tool Holders
A milling attachment is what allows the cutting tool to rotate, enabling actual material removal similar to a milling machine. For manual lathes, this typically comes as a bolt-on vertical spindle that mounts onto the compound rest. In CNC lathes, live tooling or powered turrets provide similar functionality but with far more precision and control. Tool holders must be rigid and properly aligned to avoid vibration and tool breakage. Quick-change tool posts or ER collet chucks are often used for ease of setup. Choosing the right holder ensures that milling on a lathe remains stable and accurate throughout the operation.
Milling Attachments and Tool Holders
Having the right attachment is essential for enabling milling on a lathe. Depending on the type of lathe, the approach will differ. Manual lathes require bolt-on accessories, while CNC machines often come equipped with built-in tooling systems. Below are two typical setups.
Manual Lathe Milling Attachments
On a manual lathe, milling is made possible by mounting a vertical milling attachment to the compound rest or cross-slide. These attachments include a small rotating spindle where an end mill can be installed. Most are belt-driven and adjustable in angle. Because manual lathes lack automated axes, the operator must manually control feed and depth, so simplicity and rigidity are key. For basic milling operations like surface flattening or slotting, this setup is enough. Using a solid tool holder or quick-change post helps reduce vibration and setup time.
CNC Lathe Live Tool Holders
In a CNC lathe, A power tool holder, part of a live tooling system, provides the cutting tool with rotational motion under full program control. These systems are usually part of a powered turret or Y-axis station and allow more advanced operations like drilling, tapping, and slotting without removing the part from the machine. The most common tool holders include ER collet chucks and BMT or VDI holders, depending on the lathe’s turret type. Proper alignment and torque settings are crucial to avoid tool runout. With live tooling, milling on a lathe becomes highly precise, fast, and suitable for complex multi-surface parts.

Suitable Milling Cutters
End mills are the primary tools used for milling on a lathe. They come in different geometries, flute counts, and materials, each suited for specific tasks. For most basic applications, especially when performing a milling operation on lathe machine setups, a short, two-flute end mill made from high-speed steel or solid carbide is a solid starting point. These tools offer good chip clearance and cutting balance, especially on softer metals like aluminum or brass.
As tasks become more advanced, users may consider four-flute cutters for better surface finish on harder materials. Coatings like TiN or TiAlN help reduce wear and improve heat resistance when milling on a metal lathe. Ball nose and corner-radius end mills can be used for rounding features or 3D contours, though they require stable setups. Avoid long, slender tools unless the lathe setup is extremely rigid; a tool length-to-diameter ratio under 3:1 is recommended to minimize deflection and chatter. Always match the cutter diameter to the size of the slot or profile being machined to reduce passes and improve efficiency.
Workholding Devices and Chucks
A secure workholding setup is vital for safe and accurate milling on a lathe. Unlike turning, where radial forces dominate, milling introduces significant lateral forces that can dislodge poorly clamped parts. For standard cylindrical components, a three-jaw chuck usually works well. If higher concentricity is needed, a collet chuck provides better precision and grip.
Flat or irregularly shaped parts may require custom fixtures, magnetic bases, or soft jaws machined to shape. In longer workpieces, a tailstock or steady rest can help reduce vibration and bending. Always check for any play or slippage before starting a milling operation. A stable workholding system allows you to fully utilize the capabilities of your lathe and prevents tool damage, poor surface finish, or safety issues.
Coolant, Lubrication & Safety Gear
Because milling generates more heat and chip volume than turning, proper coolant and chip control are essential. When milling on a metal lathe, using mist coolant or flood systems helps extend tool life and prevents material from overheating. For tougher materials or dry setups, apply cutting oil manually before the cut. A directed air blast can also help clear chips from the cutting path, reducing tool loading.
Safety should never be overlooked. Always wear protective eyewear and avoid loose clothing. Gloves can be used during setup but must be removed during cutting. A transparent chip guard or enclosure is highly recommended for any milling operation on lathe machine platforms. Establishing these safety habits early not only protects the operator but also ensures long-term machine reliability and better machining results.

Preparing Your Lathe for Milling Operations
Before performing any milling operation on a lathe, proper preparation is essential to ensure both safety and accuracy. Milling introduces different forces and movement patterns compared to turning, so your setup must be checked and adjusted accordingly. The goal is to stabilize the workpiece, align the tool path precisely, and reduce potential vibration. Below are key steps and considerations when getting your lathe ready for milling.
Setting Up the Workpiece
Begin by selecting the appropriate chuck or fixture to hold the workpiece securely. Since milling involves lateral cutting forces, it’s critical that the part is clamped tightly with zero movement. For cylindrical parts, a 3-jaw or 4-jaw chuck usually works well. If you’re working with flat or irregular shapes, use custom soft jaws, angle plates, or magnetic bases.
Position the workpiece so that the area to be milled is fully accessible to the cutting tool, and ensure there’s sufficient clearance between the work and the tool holder. If the part is long, consider supporting it with a tailstock or steady rest to reduce deflection during cutting. All contact surfaces should be clean to avoid slippage or alignment errors. Taking time to set up the workpiece properly reduces rework and prevents tool breakage during the milling operation on lathe machine setups.
Aligning the Milling Tool
Tool alignment is one of the most critical steps when preparing for milling on a lathe. Whether you’re using a manual milling attachment or a power tool holder as part of a live tooling system, the cutting tool must be aligned perpendicular or parallel to the intended cut path. Use a dial indicator or edge finder to center the tool relative to the workpiece surface.
Adjust the cross-slide and carriage positions precisely, and lock any unused slideways to minimize unwanted movement. For CNC lathes, verify your tool offsets and confirm the toolpath with a dry run before starting the spindle. In manual setups, visually inspect alignment by rotating the tool and observing any wobble. Poor alignment leads to uneven cuts, excessive tool wear, and reduced surface finish quality—especially when milling on a metal lathe where precision matters.
Safety Checks Before Starting
Before engaging the spindle, double-check every element of your setup. Confirm that all tools are tightened properly, that the workpiece is secure, and that coolant systems are positioned correctly. If you’re using flood coolant or mist, direct the nozzle at the cutting zone but away from any sensors or electronics.
Remove any unnecessary tools from the turret or tool post to avoid interference. Always know the location of the emergency stop switch, and never start a cut at full depth—begin with a shallow pass to verify everything is running smoothly. Safety checks are especially important for beginners learning how to mill on a lathe, as mistakes at this stage can lead to damaged parts or injury. Consistent preparation and discipline lead to smoother operations and better results.
How to Perform Milling on a Lathe (Step-by-Step)
Once your lathe is properly prepared, it’s time to begin the actual milling process. Milling on a lathe involves a combination of careful control and precision steps. Unlike conventional milling machines, a lathe requires different movement strategies and tool handling methods. Below is a simplified, step-by-step process suitable for beginners learning how to mill on a lathe.
Step 1 – Mount the Milling Tool
Start by securely installing the milling cutter into the tool holder. Whether you’re using a manual milling attachment or a CNC live tooling setup, ensure the tool is seated properly and tightened to the correct torque. For ER collet chucks or power tool holders, always check for proper collet engagement and use a torque wrench if recommended by the manufacturer. Run the spindle briefly and observe the tool for any visible runout. Even slight misalignment can lead to poor surface finish or tool breakage during the milling operation on lathe machine setups.

Step 2 – Secure the Workpiece
Next, clamp your workpiece using the chuck or fixture selected during setup. Make sure all jaws or clamps are tightened evenly to avoid movement during cutting. Recheck alignment and verify that the cutter path will not interfere with any part of the lathe, such as the carriage or tailstock. When milling on a metal lathe, workpiece stability is even more critical than in turning due to the added lateral stress from cutter rotation. If possible, perform a slow manual rotation of the spindle or a dry run to check for safe clearances.
Step 3 – Set Spindle Speed and Feed Rate
Set the spindle to an appropriate speed for the material and cutter size. For beginners, it’s safer to start at lower RPMs and shallow depths of cut. Refer to tooling charts for recommended surface speeds based on material type. The feed rate should also be conservative at first—too fast and you risk chatter; too slow and you may rub the tool, causing heat buildup. In CNC lathes, these values are input directly into the program; in manual setups, they must be controlled by hand or feed screws. Proper adjustment of these parameters is essential to achieving smooth, efficient results when performing a milling operation on a lathe.
Step 4 – Start the Cut
Once everything is set, begin the cut by slowly advancing the tool into the workpiece. Use handwheels in manual setups or G-code-controlled feed in CNC environments. Do not plunge to full depth immediately; instead, take several light passes and gradually increase the depth as the cut progresses. Watch the chips—short, consistent chips indicate proper cutting action. Listen for unusual noises that may signal tool deflection or machine instability. When milling on a lathe, especially with smaller setups, controlled entry and gradual engagement are key to protecting both tool and machine.

Basic Milling Operations You Can Do on a Lathe
Milling on a lathe isn’t just a theory—it’s a practical, powerful way to expand the capabilities of your machine. While it doesn’t replace a full-size milling machine, a properly set up lathe can handle many essential milling operations with accuracy and control. Here are some common tasks you can perform directly on your lathe using either a manual milling attachment or a live tooling system.
Face Milling
Face milling is the process of flattening the end of a workpiece. On a lathe, this is done by positioning an end mill perpendicular to the axis of rotation and slowly feeding it across the face of the part. It’s ideal for squaring off the ends of shafts or preparing a surface for further machining.
For beginners learning how to mill on a lathe, face milling is often the best starting point. It requires minimal toolpath complexity and provides immediate feedback on alignment and rigidity. Make sure to keep feed rates low and monitor chip thickness—thin, consistent chips indicate stable cutting. Use a wide, flat-bottomed end mill for best results.
Slot Milling (Keyways & Grooves)
Slot milling is another practical operation on a lathe, especially when you need to cut keyways or channels along the side of a shaft. This requires rotating the cutter and advancing the cross-slide into the part to create a controlled groove. You may also need to use a digital readout or dial indicator to ensure accurate depth and width.
When performing this type of milling operation on lathe machine setups, rigidity is critical. Use short, stubby end mills to reduce deflection, and make light, repeatable passes. Common applications include cutting keyways for gears, set screws, or mechanical coupling features. With practice, slot milling on a metal lathe can be highly precise.
Drilling and Boring
Drilling and boring can also be done using live tooling or by mounting a drill chuck on the tailstock. Drilling is useful for axial holes, while boring can enlarge existing holes to tighter tolerances. Though these aren’t strictly “milling” operations, they are often performed in the same setup and benefit from similar alignment and stability considerations.
When using a power tool holder in a CNC setup, drilling can be done off-center as part of more advanced compound machining. For manual lathes, use center drills first to avoid wandering, and always retract slowly to clear chips. These processes are essential for anyone working with holes, threads, or bearing seats.
Contouring and Profile Cutting (Advanced)
Some CNC lathes with Y-axis control or advanced live tooling can handle contour milling or profile cuts. This includes angled features, curved grooves, or 3D surfaces around the cylindrical body of the part. While not practical on basic manual machines, it shows how far milling on a lathe can go in the right setup.
These operations require accurate programming, toolpath simulation, and stable workholding. When done correctly, contouring opens up new design possibilities without the need to switch to a dedicated machining center. Even if you’re not ready for complex profiling, it’s useful to understand what’s possible with modern lathe capabilities.

Tips and Best Practices for Milling on a Lathe
Even with the right setup and tools, the outcome of milling on a lathe heavily depends on technique. Small improvements in how you approach the cut can make a big difference in finish quality, tool life, and machining accuracy. Below are practical tips and best practices that will help beginners avoid mistakes and get the most out of each milling operation on lathe machine setups.
Feed Rate, Speed, and Depth of Cut Guidelines
Choosing the right spindle speed and feed rate is critical to successful milling. Start with the recommended surface speed for your cutter and workpiece material—usually given in SFM (surface feet per minute) or m/min. For example, aluminum typically requires higher spindle speeds than steel. Convert this into RPM using the cutter diameter, then adjust the feed rate to maintain a stable chip load.
For beginners learning how to mill on a lathe, always begin with a shallower depth of cut and slower feed to minimize tool chatter. Increase gradually as confidence grows. As a general rule, depth of cut should not exceed half the cutter diameter, and feed per tooth should be matched to flute count. Slower passes are better than risking an overloaded tool, especially when milling on a metal lathe that may have lower rigidity than a full milling machine.
Improving Surface Finish
To improve finish quality, ensure your tool is sharp and the machine is rigid. Avoid climb milling unless your setup is extremely stable—conventional milling provides better control on a lathe. Use proper coolant or mist lubrication to reduce friction and carry away chips. When possible, take a light finishing pass after roughing to clean up tool marks.
Also pay attention to toolpath overlap—each pass should slightly overlap the previous cut to avoid ridges. If your lathe uses manual controls, maintain steady handwheel movement or use a fine feed gear to ensure consistency. These simple techniques can significantly boost the visual and dimensional quality of the final result.
Common Mistakes to Avoid
One of the most common beginner mistakes in milling on a lathe is using long, thin end mills for deep cuts. This leads to deflection, vibration, and poor surface finish. Always select the shortest cutter that can reach the target depth. Another issue is loose clamping—recheck all fasteners before starting, including tool holders and chuck jaws.
Avoid cutting without verifying tool alignment. Even a small misalignment can lead to tapered cuts or tool breakage. If using a CNC system, dry run the toolpath without the spindle engaged to check for collisions or unexpected moves. Never ignore chip buildup; evacuate chips regularly to prevent re-cutting, which dulls the tool and damages the part. By following these best practices, your experience with milling on a lathe will be safer, smoother, and far more productive.

Safety Guidelines for Milling on a Lathe
Milling on a lathe introduces a different set of risks compared to traditional turning. Unlike turning, where the cutting force is mainly radial, milling generates significant lateral forces. These forces can cause tool deflection, part movement, and even machine instability if not managed properly. To ensure a safe working environment—especially for beginners—it’s essential to follow a strict set of safety practices designed specifically for milling operation on lathe machine setups.
Hazards to Watch For
The most common safety risks when milling on a lathe include flying chips, tool breakage, workpiece dislodgement, and hand entanglement. Because the cutter rotates at high speed and engages material from the side, chips tend to eject laterally and can be extremely sharp. Always use a chip shield or safety screen if available.
Loose workpieces are another hazard. If the chuck or fixture loses grip during a cut, the part can shift or fly out of the machine. This is especially dangerous when milling on a metal lathe, where the material is hard and tool forces are higher. Lastly, never wear gloves while the spindle is running—rotating tools can grab fabric instantly.
Operator Safety Checklist
Before starting any milling task, walk through a basic checklist:
- Confirm the workpiece is clamped securely
- Verify that all tool holders are properly tightened
- Remove any unnecessary tools from the tool post or turret
- Ensure all slideways not in use are locked
- Position coolant lines away from electronics and sensors
- Check that chip guards are in place
- Know the location of the emergency stop button
Wear eye protection at all times and use ear protection if noise levels are high. When performing a new type of milling operation on lathe equipment, do a dry run with the spindle off to check clearances and potential collision points.
Starting slow is better than risking a crash. If anything feels unstable—vibration, tool chatter, spindle noise—stop immediately and reevaluate your setup. Safety is not about slowing down production; it’s about preventing damage, injury, and expensive downtime.
When to Use a Lathe for Milling vs a Milling Machine
While milling on a lathe is a powerful way to expand your machine’s capabilities, it’s not always the right choice. Some jobs are better suited to a dedicated milling machine, especially when part complexity, size, or production volume increases. Knowing when to use a lathe for milling operations—and when to switch to a milling machine—can save you time, improve results, and protect your equipment.
Pros and Cons of Milling on a Lathe
The biggest advantage of milling on a lathe is efficiency. If you’re already turning a part and only need a few flat surfaces, grooves, or holes, it’s far more efficient to complete those features in a single setup rather than re-clamp the part on a separate machine. This reduces setup time, improves part concentricity, and shortens production cycles.
Additionally, milling on a metal lathe is ideal for small-scale workshops or custom part production where space and budget are limited. With proper attachments or live tooling, many essential milling operations can be handled directly on the lathe.
However, there are limits. Lathes generally have less structural rigidity for side-loading cuts, which affects both accuracy and surface finish during heavier milling passes. The work envelope is also smaller compared to most milling machines, which limits part size and toolpath flexibility. Complex 3D profiles, wide surface areas, or high-speed roughing are better handled on a proper milling machine.

Ideal Situations for Lathe Milling
Milling on a lathe is best suited for concentric parts that already require turning. For example, if you’re machining a shaft and need a keyway, flat, or drilled hole along the axis, it makes perfect sense to do it right on the lathe. It’s also great for small production runs, prototyping, or one-off parts where speed and flexibility matter more than automation.
Another ideal case is when using a CNC lathe with live tooling. In such systems, performing drilling, slotting, or light milling in the same program helps reduce cycle time and boosts workflow efficiency. This is especially useful in industries like automotive, aerospace, and medical machining, where tight tolerances and reduced setups are critical.
In contrast, if your job requires extensive 3D contouring, large surface machining, or long tool reach, a dedicated milling machine remains the better choice. Each tool has its strength—the key is knowing when and why to use one over the other.
Conclusion
Learning how to mill on a lathe gives machinists more than just a shortcut—it offers a flexible, space-saving, and cost-effective way to produce complex features without switching machines. From face milling to slotting and drilling, this guide has shown that even basic lathes—when properly set up—can perform accurate and reliable milling operations on lathe machine platforms. For anyone working in tight shops, small-batch production, or custom prototyping, mastering milling on a lathe is a powerful step toward smarter, more efficient machining.
If you plan to integrate milling operations on lathe machine setups into your daily process, machine quality plays a critical role. At Rosnok, we understand this need deeply. Our range of CNC lathes—with options for live tooling, rigid cast-iron beds, and advanced control systems—is designed to support reliable, precise, and efficient milling on a metal lathe. Whether you’re producing custom parts, simplifying multi-step machining, or exploring how to mill on a lathe for the first time, Rosnok machines are built to help you achieve stable, high-quality results every time.

FAQ
How can I tell whether poor results come from my setup or from the machine itself?
If tightening fixtures, locking unused axes, and reducing cutting load do not noticeably improve surface finish or stability, the limitation is likely structural. At that point, no parameter adjustment will compensate for insufficient rigidity or spindle design.
Is milling on a lathe suitable for batch production, or only for one-off jobs?
It is best suited for one-off parts, prototypes, repair work, or very small batches. Once repeatability, cycle time, and consistency become priorities, a dedicated milling solution becomes far more cost-effective.
What types of parts should never be attempted with a lathe milling setup?
Parts requiring deep pockets, heavy side cuts, tight positional tolerances across multiple axes, or complex 3D contours should not be milled on a lathe. These operations demand rigidity and axis control beyond what a lathe can reliably provide.
What are the limitations of milling on a lathe?
Rigidity: Lathes are not as rigid as mills; heavy cuts may cause vibration.
Cutting range: Limited by travel of the cross-slide or compound.
Setup time: More complex due to lack of dedicated fixtures.
Tool holding: Often less secure than a dedicated spindle.
If you’re doing more than occasional milling, a dedicated milling machine or a CNC machining center is a better investment.
How do experienced machinists decide whether to “make do” or upgrade equipment?
They evaluate three factors:
– Frequency of milling operations
– Tolerance requirements
– Rework rate
If milling becomes routine rather than occasional, upgrading is no longer optional—it’s economical.
How do shops typically transition from lathe milling to proper milling solutions?
Most start with occasional lathe milling, then move to CNC lathes with live tooling, and finally adopt machining centers once part complexity and volume justify it. Each step reduces manual intervention and improves repeatability.